TL;DR
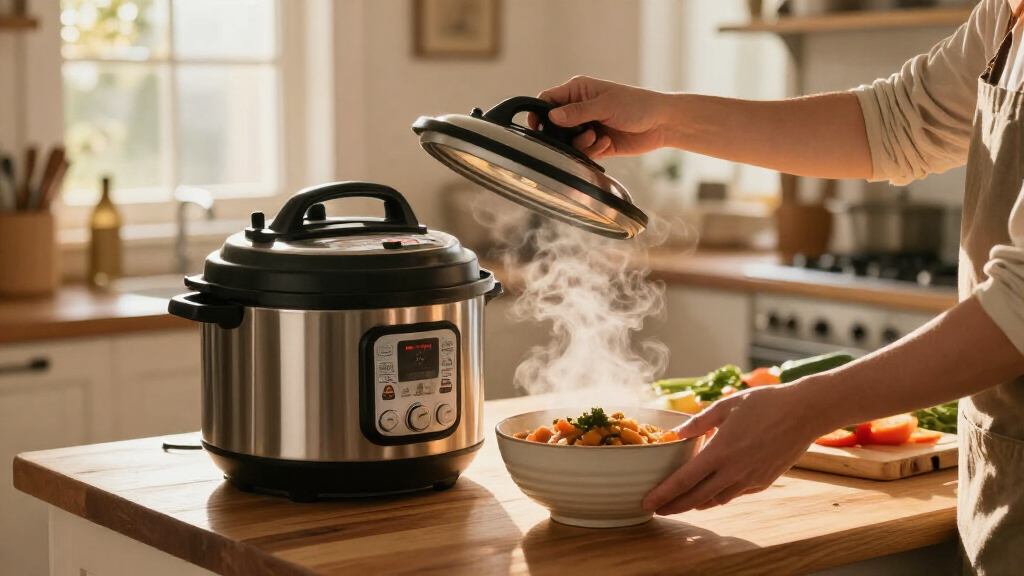
Electric pressure cookers use an electric heating element and a sealed lid to build steam pressure, letting food cook at a higher temperature than in an open pot. They can make beans, grains, soups, and tough cuts more convenient, but the full cooking time includes coming to pressure and releasing it. Follow your model’s manual, use the required liquid, and keep hands clear of the steam valve.
A pot of dried beans can simmer for hours on the stove; an electric pressure cooker can make that same weeknight plan feel far more manageable. The catch is that the number on a recipe is not the whole clock: your cooker needs time to build pressure and let it fall again.

Get kitchen gear delivered free with Prime
- Fast, free delivery on millions of items
- Prime Video, Amazon Music and more included
- Member-only deals all year
Electric pressure cookers use an electric heating element and a sealed lid to cook food under pressure. This guide explains how that process works, what these appliances do especially well, how to use pressure release safely, and what to check before choosing a model.
You will also learn why a cooker’s advertised capacity is not the amount you can always fill, why pressure cooking will not brown a roast by itself, and when a slow cooker or air fryer may suit the job better. A few practical checks can make the difference between a tender bowl of stew and a rushed dinner with a stubborn lid.
Add pressurizing and release time to the recipe’s stated pressure-cooking time when planning dinner.
Use the amount of liquid specified by the manual or recipe; pressure cooking needs liquid to create steam.
Keep hands and face away from the steam valve, and never force open a pressurized lid.
Leave headroom for food, especially ingredients that foam or expand, and remember that usable capacity is below the pot’s full volume.
Pressure cooking tenderizes and retains moisture, but you need sautéing or another finishing step for browned or crisp surfaces.
How pressure turns a long simmer into a shorter cook
An electric pressure cooker heats liquid beneath a sealed lid, building steam that raises the pressure inside the pot. Higher pressure raises water’s boiling point, so the liquid and steam can become hotter than they would in an open pot. That added heat speeds up the cooking reactions that soften beans, grains, and connective tissue in tough cuts.
The sealed pot changes the cooking environment as well as the temperature. Steam stays inside instead of escaping continuously, so the food is surrounded by moist heat and the liquid is less likely to boil away. That helps retain moisture, but it also means there is little opportunity to stir, taste, or adjust seasoning while the lid is locked. It is useful for foods that benefit from steady heat; it is less suited to dishes that need frequent attention or a dry, crisp finish.
Think of a batch of chickpeas on a chilly evening: in an open pot, you watch the water bubble for a long time; in a pressure cooker, the sealed chamber holds heat and steam around the beans. The cooker regulates heat and pressure with built-in controls, then holds the cooking conditions for the set time. The appliance does not make the beans cook instantly: it first has to heat the contents enough to create steam and reach its operating pressure.
The timer does not start the whole meal’s clock. Your cooker must first heat the contents and reach pressure, and pressure has to fall before you open the lid. More food, colder ingredients, and a larger volume of liquid can all extend the first wait; the release method affects the last one. A small batch may come to pressure faster than a large pot of cold ingredients, so a recipe’s listed cook time can understate the time from countertop to bowl.
Many models also sauté, steam, cook rice, slow-cook, or keep food warm. Those features vary by model, and a preset is a starting point rather than a guarantee: an icy, full pot of soup behaves differently from a small batch of room-temperature ingredients. The useful question is whether a mode fits foods you actually make, since extra functions add convenience only if they earn their counter or storage space.
Products Worth Considering

Le Creuset Alpine Enameled Cast Iron Fondue Set, 2.5 qt., Nuit

Traeger Pro 22 Wood Pellet Grill & Smoker

Breville Smart Grinder Pro Conical Burr Coffee Grinder, Brushed Stainless Steel
As an affiliate, we earn on qualifying purchases.
Which foods reward pressure cooking most
Electric pressure cookers shine when a dish needs sustained moist heat: beans, grains, soups, and tough cuts of meat are natural fits. The higher cooking temperature can soften these foods faster, while the sealed environment limits evaporation. That combination is valuable for a busy cook, although it does not remove the need to use suitable liquid or account for the time needed to pressurize and release.
For example, on a busy Sunday, you can use the sauté function to soften onions, add broth and browned beef, then pressure-cook a stew. Browning first builds savory flavors through surface browning, something the sealed pressure stage cannot do. The cooker reduces hands-on stove watching, but the meat still needs the recipe’s timing and enough liquid. Afterward, a few minutes uncovered can thicken a broth that tastes too thin; this finishing step also gives you a chance to taste and adjust the seasoning.
Pressure cooking does not create a browned or crisp surface by itself. A pot roast may come out tender and juicy yet pale because the moist, sealed environment favors tenderness over a dry, browned exterior. Brown it before pressure cooking for flavor, or use a separate finishing step if color or crispness matters. Some multifunction models include air-fry modes or a separate crisping lid, though names and included parts differ from one product to another.
Results also depend on ingredient size and quantity. Smaller pieces heat and cook more evenly than a large frozen block, which may be hot at the edges and cold in the center. Cut-up frozen pieces may work in some recipes with adjusted timing, but they can still lengthen the time to pressure. If you are cooking from frozen, choose a recipe written for that situation instead of guessing at the clock.
Count the whole cooking time before you plan dinner
The full time for an electric pressure cooker meal includes the recipe’s pressure-cooking minutes, the time needed to reach pressure, and the chosen pressure-release time. Those extra stages can change whether a dish fits a rushed evening or needs a head start. They are not fixed overhead: the cooker’s fill level, ingredient temperature, and recipe all affect the wait.
Imagine a recipe calls for 20 minutes under pressure. A large pot of cold soup may take a while to pressurize, and a natural release can add more waiting before you can safely open the lid. The total may be much longer than 20 minutes, even though you can use that hands-free time to set the table or chop parsley. A quick release may shorten the wait, but it is not interchangeable with natural release in every recipe: some foods foam or splatter, and some benefit from pressure falling gradually.
Use this simple sequence when you plan:
- Read the recipe’s complete method. Check whether it specifies natural or quick release, and note any sautéing or finishing steps.
- Add the uncounted stages. Allow time for the cooker to heat and pressurize, then for pressure to fall. If the recipe gives a total estimate, use it as a guide and allow some flexibility for batch size and starting temperature.
- Match the recipe to your evening. If dinner has a hard deadline, choose a dish with a suitable total timeline rather than judging by pressure minutes alone.
Pressure release affects texture as well as timing. A recipe may call for a natural release so meat stays tender or foaming liquid settles; gradual pressure loss also lets cooking continue briefly. A quick release vents steam through the valve and stops that gradual process sooner, but can be a poor fit for very foamy foods. Follow the recipe, keep your face and hands away from the outlet, and do not force the lid open while pressure remains.
Choose a size and shape that fit your actual meals
A cooker’s capacity label describes the inner pot’s full volume, not the amount of food you can safely pressure-cook. You need headroom, and foods that foam or expand need extra room, so your usable cooking capacity is smaller than the number printed on the box. This matters in practice because choosing a pot that is too small can mean splitting a recipe into batches, while a pot that is far larger than your usual meals may take up space and be less convenient to handle.
Consider a household that makes oatmeal on weekdays and a big pot of chili for friends on Saturday. A compact model may suit the weekday routine but leave little room for the larger batch. Beans and grains expand as they cook, which makes the fill limit especially relevant for those dishes. Check the manual’s limits for foods that foam or expand, then compare them with the portions you actually expect to make.
Shape matters too. A wider pot gives you more surface area to brown onions or meat before adding liquid, which can make the sauté step quicker and reduce the need to brown in batches. In a narrow pot, you may need to brown in batches, and a crowded base can leave ingredients steaming instead of taking on color. A wide pot can be less convenient to store, so consider whether the added cooking surface is worth the footprint in your kitchen.
Before buying, picture where the cooker will live. Measure the shelf or counter space, consider the inner pot size you can lift and wash, and check whether the lid needs clearance to open. For example, a large appliance that barely fits under a cabinet may be awkward to use every time you make rice. Also consider who will handle a full inner pot: capacity helps only if the pot remains manageable to move and clean.
Keep steam, seals, and liquid under control
An electric pressure cooker is safe to use when its parts are intact and you follow the model’s manual. Before each cook, check that the sealing ring sits correctly, the lid locks, the valve is clear, and the required liquid is in the pot. These checks help the cooker build and hold pressure as designed; a ring that is out of place or a blocked valve can interfere with that process.
That liquid matters: the cooker needs steam to build pressure. If a recipe or manual specifies a minimum amount, do not reduce it casually. A thick sauce alone may not provide enough free liquid, so a cook might need broth or water before adding a concentrated sauce on top. Too little suitable liquid can prevent pressure from building properly, while adding more than a recipe needs can dilute flavor or change texture.
Steam can burn quickly. Keep your face and hands away from the valve during a quick release, and never try to twist the lid open while the cooker is pressurized. If steam keeps leaking around the lid, stop and check the ring for food debris, a poor fit, or damage; consult the manual if the problem continues. A leak can keep the cooker from holding pressure, so continuing to cook may give an unpredictable result.
Do not treat a standard electric pressure cooker as a pressure canner. Home canning calls for equipment and tested procedures approved for the specific food and process.
After cooking, clean the inner pot and lid parts as the manufacturer directs. Rinse food residue from the valve area, empty the condensation collector if your model has one, and replace a worn ring only with a compatible part. Residue can interfere with the seal or valve, and an old ring may no longer fit snugly. A clean, well-seated seal helps the next pot of lentil soup come to pressure as expected.
Compare the convenience with the trade-offs
An electric pressure cooker can reduce active stove watching, but it does not make every meal faster or better. It takes up storage space, gives you less opportunity to taste and adjust while sealed, and may require recipe changes when you adapt an oven or stovetop dish. Its main convenience is unattended cooking during the pressurized stage; the trade-off is planning around a sealed process with less mid-course control.
For example, a weekday bean soup may suit pressure cooking because the beans need sustained heat and moisture. A crisp-skinned roast chicken asks for a different finish: pressure can cook the meat, but an open oven or suitable air-fry function is needed to brown the skin. The choice depends on the result you value: tender food with less active attention, or a texture that needs direct dry heat.
| Cooking approach | What it does well | What to plan for |
|---|---|---|
| Pressure cooking | Beans, soups, grains, and tenderizing tough cuts | Time to pressurize and release; little browning while sealed |
| Slow cooking | Long, gentle cooking with food ready later | Usually needs a longer lead time |
| Air frying | Crisp, browned surfaces on suitable foods | Different texture and cooking method from pressure |
Some recent multifunction products combine several modes, use interchangeable lids, or offer guided controls and app features. Check the exact model’s included functions; a product name alone does not tell you whether the crisping lid comes in the box. Each added mode can save a separate appliance or step, but only if it performs well enough for the foods you make. Choose the modes you will use, not just the longest feature list.
Shorter cooking may use less energy for some dishes, though savings depend on the recipe, appliance, and use. A meal that reaches pressure quickly may benefit more than one with a long pressurizing and release period. If you make a pressure-cooked meal twice a week but store the appliance in a hard-to-reach cupboard, convenience may matter more than a theoretical energy comparison.
Frequently Asked Questions
Can you cook without liquid in an electric pressure cooker?
No. Pressure cooking needs liquid to produce steam and build pressure. Use the minimum amount specified by your recipe or cooker manual.
Can you cook frozen food in an electric pressure cooker?
Some foods can be cooked from frozen, but frozen ingredients generally take longer to bring the pot to pressure. Large frozen blocks can cook unevenly, so use a recipe written for frozen food and its recommended timing.
What is the difference between quick release and natural release?
Quick release vents steam through the valve, while natural release lets pressure fall gradually on its own. Follow the recipe’s direction, since release time can affect texture and safety; keep your hands and face clear of escaping steam.
Can an electric pressure cooker replace a slow cooker or air fryer?
Some multifunction models offer slow-cook or air-fry modes, but the results and timing differ. Pressure cooking does not create a crisp surface on its own, so you may need a separate oven, air-fry mode, or finishing step.
Can you use a standard electric pressure cooker for canning?
Do not assume a standard electric pressure cooker is a pressure canner. Home canning requires equipment and tested procedures approved for the specific food and process.
Conclusion
Remember one simple rule: plan for the whole cooking cycle, not only the minutes under pressure. Choose a recipe that matches your evening, use the required liquid, and follow the model’s instructions for sealing and release.
Then let the cooker do its quiet work while you set the table. When the steam clears, the lid opens, and a pot of tender beans or stew fills the kitchen with warmth, the extra planning feels small.