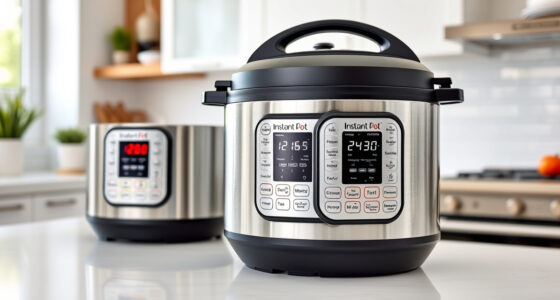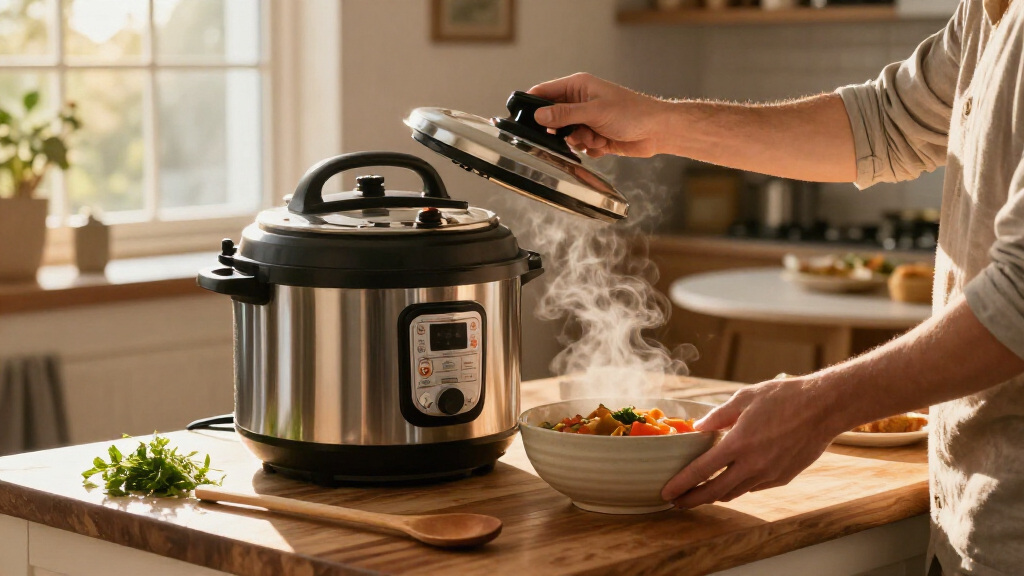

This guide shows beginners how to prepare an electric pressure cooker, cook a recipe, release pressure, and clean the appliance. Follow the cooker manual and your recipe, since fill limits, settings, and cooking times vary by model and food. Allow 30-60 minutes for a first cooking session, including preparation and pressure release.

Get kitchen gear delivered free with Prime
- Fast, free delivery on millions of items
- Prime Video, Amazon Music and more included
- Member-only deals all year

Instant Pot Duo 6 Qt 7-in-1 Electric Pressure Cooker, Stainless Steel
- ✔ Capacity: 5.68 liters
- ✔ Power: 1000 watts
- ✔ Cooking functions: 7-in-1

DUMOS 16-in-1 Electric Pressure Cooker, 6QT Programmable Multi Cooker with 12 One-Touch Presets, Soup Steam Yogurt and More, Cera…
- ✔ Capacity: 6.34 quarts
- ✔ Power: 1000 watts
- ✔ Functions: 16 total

UNANEST 6-Qt 9-in-1 Electric Pressure Cooker with Ceramic-Coated Pot
- ✔ Capacity: 6 quarts
- ✔ Power: 1000 watts
- ✔ Cooking functions: 9
Difficulty: Beginner | Time: 30-60 minutes, depending on the recipe
What You’ll Need
Tools & Materials:
- Electric pressure cooker with its inner pot, lid, and sealing ring
- Recipe written for an electric pressure cooker
- Measuring cup and measuring spoons
- Ingredients and cooking utensils
- Heat-safe surface and oven mitts
Knowledge:
- Basic measuring and food preparation
- Ability to identify the cooker’s pressure valve and controls using its manual
Read the manufacturer’s safety instructions before first use. Check the recipe for required pressure level, liquid amount, fill limit, and release method. Keep the cooker away from the edge of the counter, and do not use a damaged lid, cord, sealing ring, or inner pot.
Instant Pot Duo 6 Qt 7-in-1 Electric Pressure Cooker, Stainless Steel
The Instant Pot Duo earns our top spot by combining the pressure-cooking essentials with six other functions, including sautéing, slow cooking, rice making, steaming, and yogurt preparation. That range can reduce the need for separate countertop appliances, while the stainless-steel tri-ply inner pot is a practical differentiator for cooks who want a durable cooking surface rather than a ceramic-coated nonstick pot. It is also listed as dishwasher safe, which helps with routine cleanup.Compared with DUMOS and UNANEST, the Duo has fewer headline functions, but its supplied details emphasize 13 smart programs and more than ten safety mechanisms. That combination makes it our clearest general-purpose recommendation. The compromises are physical: at 14.6 pounds it is the heaviest of this trio, and its footprint may crowd a small counter. Its permanently attached cord also limits placement flexibility. We would choose it for a home cook who values a versatile, stainless-steel-centered appliance; cooks who prioritize a lighter unit or a coated pot should compare the alternatives.
Pros:
- Seven cooking functions cover pressure cooking and several common countertop tasks.
- Tri-ply stainless-steel inner pot is dishwasher safe and provides an alternative to coated surfaces.
- Thirteen smart programs and more than ten listed safety mechanisms support varied use.
- App access to hundreds of recipes can help cooks get started with the appliance.
Cons:
- At 14.6 pounds, it is the heaviest model in this comparison.
- Its dimensions and attached power cord can make placement less convenient.
Best for: Households seeking one versatile electric pressure cooker with a stainless-steel inner pot and multiple familiar cooking modes.
Not ideal for: People with limited counter space, those who move or store their cooker frequently, or cooks specifically seeking a ceramic-coated pot.
Bottom line: We recommend the Duo as the strongest all-around choice for cooks who want broad functions and a stainless-steel pot and can accommodate its size.
“We recommend the Duo as the strongest all-around choice for cooks who want broad functions and a stainless-steel pot and can accommodate its size.”
DUMOS 16-in-1 Electric Pressure Cooker, 6QT Programmable Multi Cooker with 12 One-Touch Presets, Soup Steam Yogurt and More, Cera…
DUMOS is the most feature-heavy option on paper, with 16 total functions, 12 one-touch presets, and a delay start that can be scheduled up to 24 hours ahead. Its 6.34-quart capacity is close to the other two cookers, so the main reason to choose it is not a dramatically larger batch size. It is the better match for cooks who want preset-led operation and the option to plan cooking in advance.Its ceramic inner pot offers a different cleanup and food-release experience from the Duo’s stainless steel. The removable lid, sealing ring, and pot are described as dishwasher safe, which may appeal to cooks who would rather avoid scrubbing a bare metal cooking surface. Compared with UNANEST, DUMOS claims more functions and includes a recipe guide; compared with the Duo, it weighs less but is still a substantial appliance at 11.9 pounds. The tradeoff is a potentially less intuitive digital interface for anyone accustomed to simpler controls, and its broad function count does not by itself establish that every mode is useful to every household.
Pros:
- Sixteen stated functions and 12 one-touch presets provide a wide menu of cooking options.
- Ceramic inner pot and dishwasher-safe removable components are aimed at easier cleanup.
- A 24-hour delay start supports advance scheduling when ingredients are suitable for it.
- Capacity is listed at 6.34 quarts, in the same general household-size class as the others.
Cons:
- Its digital controls may feel less intuitive to cooks who prefer manual knobs.
- The 11.9-pound body and roughly 13-inch height still require a dedicated storage or counter spot.
- The ceramic pot’s nonstick-style surface may not suit buyers who specifically want stainless steel.
Best for: Cooks who like one-touch presets, want a ceramic inner pot, and value scheduling cooking ahead.
Not ideal for: People who prefer manual controls, want the lightest cooker, or would rather have a stainless-steel inner pot.
Bottom line: Choose DUMOS when presets, advance scheduling, and a ceramic pot matter more than a simpler interface or stainless-steel construction.
“Choose DUMOS when presets, advance scheduling, and a ceramic pot matter more than a simpler interface or stainless-steel construction.”
UNANEST 6-Qt 9-in-1 Electric Pressure Cooker with Ceramic-Coated Pot
UNANEST takes a more focused approach than DUMOS, pairing nine cooking functions with an IMD touchscreen and a ceramic-coated aluminum pot. Its modes include pressure cooking, rice cooking, slow cooking, steaming, sautéing, sterilizing, warming, and baking. That makes it a flexible multi-cooker, though buyers choosing primarily for pressure cooking may not need every extra mode. The listed 24-hour delay start adds scheduling convenience similar to DUMOS.Compared with the Duo, UNANEST swaps stainless-steel tri-ply construction for a ceramic-coated nonstick surface and touchscreen controls. It is also lighter at 11.5 pounds, though its dimensions still call for meaningful counter or cabinet space. The supplied description lists 16 or more protections, including lid-lock protection, steam-release control, and boil-dry protection, giving more detail about specific safeguards than a generic safety claim. One limitation applies to delayed cooking: ingredients that need refrigeration should not be left out waiting for a scheduled start. We see this as a good fit for touchscreen users who prefer a coated pot, but the Duo remains the more balanced pick for broad everyday versatility.
Pros:
- Nine modes span pressure cooking and several useful multi-cooker functions.
- Ceramic-coated pot is designed to support food release and easier cleanup.
- Touchscreen consolidates controls on one panel, and delay start can be set up to 24 hours.
- Listed protections include lid lock, steam-release control, and boil-dry protection.
Cons:
- Its 6-quart capacity may be limiting for larger batch cooking.
- Delay start is unsuitable when ingredients cannot safely remain unrefrigerated before cooking.
- The coated aluminum pot differs from the stainless-steel inner pot offered by the Duo.
Best for: Cooks who want touchscreen controls, a ceramic-coated pot, and a defined set of nine cooking modes.
Not ideal for: People who need a larger batch capacity, prefer stainless steel, or plan to use delay start with ingredients requiring refrigeration.
Bottom line: UNANEST is the touchscreen-focused choice for cooks who want a ceramic-coated pot and a defined set of functions in a 6-quart cooker.
“UNANEST is the touchscreen-focused choice for cooks who want a ceramic-coated pot and a defined set of functions in a 6-quart cooker.”
As an Amazon Associate we earn from qualifying purchases.
Before You Start
Set the cooker on a stable, dry surface with open space around the steam release. Steam can burn skin, so keep your face and hands away from the valve. Never force the lid open while the cooker is pressurized. Pressure cooking requires liquid to produce steam; use the amount specified by the manual or recipe. Do not fill above the marked maximum line, and use the lower limit specified for foods that expand, foam, or froth, such as beans, grains, and oatmeal.
Step-by-Step Instructions
Step 1: Check the cooker and parts
Unplug the cooker and remove the inner pot. Confirm the pot is clean and dry on the outside, then check that the sealing ring is seated evenly in the lid and that the steam valve is clean and unobstructed. Look for cracks, tears, food residue, or loose parts. Set the inner pot back inside the cooker.
Tip:Use only parts intended for your model. A ring that is twisted or not fully seated can prevent the cooker from reaching pressure.
Check: The pot sits flat, the ring lies evenly in its track, and the lid parts appear clean and undamaged.
Step 2: Prepare the ingredients
Measure and cut ingredients as the recipe directs. Add the specified cooking liquid to the inner pot; do not assume ingredients such as frozen vegetables or meat provide enough liquid. Add ingredients in the order the recipe gives, and keep the total below the appropriate fill line. For ingredients that expand or foam, follow the cooker’s lower fill limit.
Tip:Do not add thick sauces as the only liquid unless the recipe and manual allow it. Thick mixtures may scorch or prevent pressure from building. A recipe may ask you to add thin liquid first and place thicker ingredients on top.
Check: The recipe’s liquid is in the pot, ingredients are below the correct fill line, and nothing blocks the rim.
Step 3: Close and lock the lid
Wipe the pot rim so food does not interfere with the seal. Place the lid on the cooker and turn or latch it into the locked position shown in the manual. Move the steam release valve to the sealing position if your model has a manual valve. Confirm that the float valve is free to move.
Tip:Some models seal automatically when a pressure program starts; others require you to set the valve. Check the lid markings and manual instead of guessing.
Check: The lid is locked, the sealing ring remains in place, and the steam release is set as the manual specifies for pressure cooking.
Step 4: Select the cooking program
Choose the pressure level and cooking time from your recipe. Select the pressure-cook or manual program, then use the controls to set the time. Start the cooker. The display may show a preheating message or count upward before the programmed cooking countdown begins; this is normal while the cooker builds pressure.
Tip:Cooking time in a recipe usually refers to time at pressure. Heating and pressure release add time, so allow for both.
Check: The display shows the selected program or time, and the cooker begins heating without an error message.
Step 5: Wait for cooking to finish
Let the cooker run without moving it or covering its vents. Keep children and pets away from the steam outlet. When the cooking cycle ends, check the recipe for its specified release method before touching the valve or lid.
Tip:A small amount of steam or moisture may appear around the valve during heating. If steam escapes continuously from the lid edge or the cooker displays an error, use the troubleshooting guidance and manual.
Check: The cooker signals that the timed cycle has ended. The food remains enclosed until pressure is released.
Step 6: Release pressure as directed
Use the release method specified by the recipe. For a natural release, leave the valve in the sealing position and wait the stated time; the float valve will drop when pressure has fallen. For a quick release, carefully move the valve to venting using the method shown in the manual, keeping your hands and face clear of the steam. For a timed natural release followed by quick release, wait the recipe’s interval first, then vent the remaining pressure.
Tip:Foamy or starchy foods can spray through the valve during quick release. If the recipe calls for natural release, follow it. Never hold a towel over the valve or put your hand over the steam.
Check: The float valve has dropped and steam has stopped escaping before you try to open the lid.
Step 7: Open the lid and check the food
Unlock and open the lid away from your face so residual steam moves away from you. Use utensils to remove food, and check doneness using the recipe’s cues, such as tenderness or a food thermometer. If food needs more cooking, add liquid if needed, lock the lid, and run another short cycle according to the recipe.
Tip:Use a food thermometer for meat and other foods where safe internal temperature matters; color alone is not a reliable doneness check.
Check: The lid opens without resistance, and the food meets the recipe’s texture or temperature guidance.
Step 8: Unplug and clean the cooker
Turn off and unplug the cooker. Let the inner pot and lid cool, then wash the pot and removable lid parts according to the manual. Clean food residue from the sealing ring, valve, and float valve without damaging them. Wipe the cooker base with a damp cloth; never immerse the base or cord in water. Dry all parts before storage.
Tip:Store the lid loosely or with the sealing ring removed if your manual recommends it. This helps the parts dry and reduces trapped odors.
Check: The cooker is unplugged, removable parts are clean and dry, and the electrical base has not been submerged.
Common Mistakes to Avoid
- Starting a pressure cycle without enough thin liquid. — Measure the amount required by the recipe and manual. Thick sauce alone may not provide enough usable liquid.
- Overfilling the pot, especially with foods that expand or foam. — Follow the marked maximum line, or the lower limit specified for beans, grains, and foaming foods.
- Trying to open the lid before pressure has dropped. — Wait until the float valve drops and the steam release stops. Never force the lid.
- Using quick release for a food that can foam or spray. — Follow the recipe’s release instructions. Use natural release when directed, particularly for foamy foods.
Troubleshooting
Problem: The cooker will not build pressure or steam escapes around the lid.
Solution: Cancel the cycle and wait for pressure to fall fully before checking the cooker. Confirm the ring is clean, seated evenly, and undamaged; check that the lid is locked and the valve is set correctly. Add the required liquid if needed, then restart. Consult the manual if leakage continues.
Problem: The cooker displays a burn or overheat warning.
Solution: Turn off the cooker and follow the manual’s instructions. Once it is safe to open, check for scorched food on the bottom. Clean the pot, add the recipe’s required thin liquid, and layer thick ingredients as directed. Do not scrape burnt food into a new cycle.
Problem: The lid will not open after cooking.
Solution: Do not force it. Confirm the steam release is in the venting position only if the manual allows, and wait for the float valve to drop. If the valve remains raised, pressure is still inside; allow more time and keep clear of the outlet.
Problem: The food is still firm or undercooked.
Solution: Check the recipe’s doneness guidance. If the food needs more time, add a little liquid if the pot is dry, lock the lid, and cook in a short additional cycle. Check again after pressure has been released safely.
What Success Looks Like
The cooker completes the recipe’s pressure cycle without persistent steam leakage or an error, and you release pressure using the specified method. The float valve drops before you open the lid, the food meets the recipe’s doneness guidance, and the cooker is unplugged and cleaned after use.
Next Steps
Record any timing adjustments that worked for your ingredients and model. Wash and dry the sealing ring and valve parts after each use, and inspect the ring regularly for damage or odors that remain after washing. Replace worn parts with model-compatible components. If the cooker repeatedly leaks, overheats, or shows an error, stop using it and follow the manufacturer’s service guidance.
Frequently Asked Questions
How much liquid should I add?
Use the amount required by your cooker manual and recipe. The minimum varies by model and recipe, so do not rely on a universal quantity. Thick sauces may need thin liquid added separately.
Can I put frozen food straight into the cooker?
Some recipes support cooking from frozen, but heating takes longer and results depend on food size and type. Follow a recipe written for frozen ingredients and use a thermometer when checking meat.
What is the difference between natural and quick release?
Natural release lets pressure fall on its own while the valve stays sealed. Quick release vents steam through the valve. Use the method and timing specified in the recipe, since release affects both cooking and food texture.
Why is the cooker taking longer than the recipe’s stated time?
The listed pressure-cooking time usually excludes the time needed to heat the ingredients and build pressure, as well as the release period. Larger quantities or cold ingredients can extend preheating.
Can I leave the cooker unattended?
Use the appliance only as its manual permits, on a stable surface with the steam outlet clear. Keep the cord away from hot surfaces, and do not leave children near the cooker while it is operating or releasing steam.