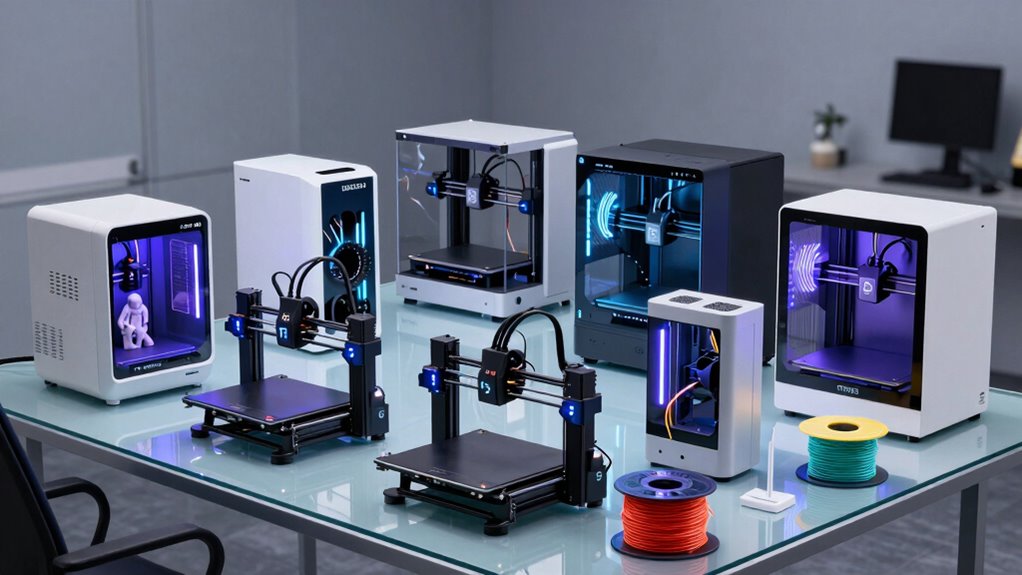

The best 3D printer for most people is the Bambu Lab P2S Combo, which pairs an enclosed printer with an automatic material system for versatile, multicolor projects. The Bambu Lab A1 is a more approachable open-frame choice, while the Creality K2 Plus suits buyers who want a larger enclosed machine. Your main tradeoffs are print volume, enclosure, material handling, setup effort, and whether multicolor printing is worth added complexity and waste. Resin models serve a different purpose, especially detailed miniatures, and are less suited to casual, low-mess use. Read on for the full comparison and recommendations by project type.

Get kitchen gear delivered free — and shop member deals
- Fast, free delivery on millions of items
- Access to Prime Big Deal Days deals on October 6–7
- Prime Video, Amazon Music and more included
Complete the kit


Key Takeaways
- The P2S Combo is the strongest all-rounder here: its enclosed format and AMS 2 Pro make it more versatile than the open A1, while adding multicolor capability without moving to a large-format machine.
- Multicolor options solve different problems: the P2S Combo and P1S Combo bundle an automatic material system, while the Creator 5 Pro and Snapmaker U1 use four toolheads; compare workflow and project needs, not color count alone.
- Open-frame printers can be the sensible home pick: the Bambu Lab A1 and FLASHFORGE Adventurer 5M trade enclosure for simpler access and a smaller commitment to enclosed-machine features.
- Large build volume has a cost in space and planning: the Creality K2 Plus serves oversized projects, but buyers printing mostly small parts may get more practical value from a compact printer.
- Resin printing is a separate choice: the Creality HALOT-X1 Neo targets fine detail, while FDM printers across this lineup better fit functional parts, larger objects, and a less involved cleanup routine.
| AOSEED AI 3D Printer for Kids |  | Best for Kids | Print speed: 220–250 mm/s; up to 400 mm/s peak | Print precision: Up to 0.05 mm | Printing: Single-color | VIEW ON AMAZON | See Our Full Breakdown |
| FLASHFORGE Creator 5 Pro 4-Toolhead 3D Printer |  | Best for Engineering Materials | Toolheads: Four independent toolheads | Toolhead change time: Seven seconds | Heated chamber: Up to 65°C | VIEW ON AMAZON | See Our Full Breakdown |
| Bambu Lab P2S 3D Printer Combo with AMS 2 Pro |  | Best for Filament Management | Printer type: FDM 3D printer | Maximum print speed: 600 mm/s | Included system: AMS 2 Pro | VIEW ON AMAZON | See Our Full Breakdown |
| Snapmaker U1 4-Toolhead 3D Printer |  | Best for Large Multi-Color Prints | Toolheads: Four independent toolheads | Tool change time: About five seconds | Maximum print speed: 500 mm/s | VIEW ON AMAZON | See Our Full Breakdown |
| FLASHFORGE AD5X Multi-Color CoreXY 3D Printer | 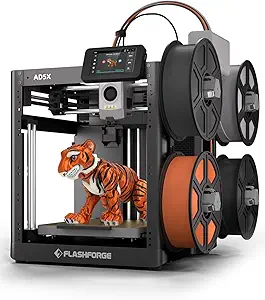 | Best Value Multi-Color Pick | Printing colors: Up to four | Maximum print speed: 600 mm/s | Acceleration: 20,000 mm/s² | VIEW ON AMAZON | See Our Full Breakdown |
| Bambu Lab A1 FDM 3D Printer |  | Best for Beginners | Printing technology: FDM | Maximum acceleration: 10,000 mm/s² | Calibration: Automatic | VIEW ON AMAZON | See Our Full Breakdown |
| Creality K2 Plus 3D Printer |  | Best for Large Prints | Build volume: 350 × 350 × 350 mm | Maximum print speed: Up to 600 mm/s | Acceleration: 30,000 mm/s² | VIEW ON AMAZON | See Our Full Breakdown |
| Flashforge Adventurer 5M Pro 3D Printer |  | Best for Enclosed, Filtered Printing | Build volume: 8.7 x 8.7 x 8.7 inches | Maximum print speed: 600 mm/s | Maximum acceleration: 20,000 mm/s² | VIEW ON AMAZON | See Our Full Breakdown |
| Bambu Lab P1S Combo 3D Printer with AMS |  | Best for Included Multicolor Printing | Printer type: Enclosed 3D printer with AMS | Maximum printing speed: 500 mm/s | Acceleration: 20,000 mm/s² | VIEW ON AMAZON | See Our Full Breakdown |
| Bambu Lab P1S Enclosed FDM 3D Printer |  | Best Enclosed Upgrade | Printer type: FDM 3D printer | Design: Fully enclosed | Maximum print speed: 500 mm/s | VIEW ON AMAZON | See Our Full Breakdown |
| Creality HALOT-X1 Neo Resin 3D Printer |  | Best for Detailed Miniatures | Display: 6.8-inch 9K LCD | Display resolution: 8520 × 4320 | XY resolution: 18 μm | VIEW ON AMAZON | See Our Full Breakdown |
| Bambu Lab A1 mini 3D Printer with LED Lamp Kit |  | Best for Beginner Lamp Projects | Included accessory: LED Lamp Kit | Calibration: Automatic | Noise level: ≤48 dB | VIEW ON AMAZON | See Our Full Breakdown |
| Creality Ender 3 V3 SE 3D Printer |  | Best for Flexible Filament Basics | Print speed: Up to 250 mm/s | Acceleration: 2500 mm/s² | Supported filaments: PLA, PETG, TPU | VIEW ON AMAZON | See Our Full Breakdown |
| FLASHFORGE Adventurer 5M 3D Printer |  | Best for High-Speed Filament Printing | Print size: 220 × 220 × 220 mm | Maximum printing speed: 600 mm/s | Acceleration: 20,000 mm/s² | VIEW ON AMAZON | See Our Full Breakdown |
| Creality SPARKX i7 Nano Combo Multi-Color 3D Printer |  | Best for Automated Multi-Color Printing | Build volume: 260 × 260 × 255 mm | Multi-color printing: Up to 4 colors | Filament monitoring: Detects breakage, tangling, and empty feed | VIEW ON AMAZON | See Our Full Breakdown |
| 3d printer | Dimensions |
|---|---|
| AOSEED AI 3D Printer for Kids | — |
| FLASHFORGE Creator 5 Pro 4-Too | 16 × 14 × 18 inches |
| Bambu Lab P2S 3D Printer Combo | — |
| Snapmaker U1 4-Toolhead 3D Pri | 22.6 × 13 × 14.2 inches |
| FLASHFORGE AD5X Multi-Color Co | — |
| Bambu Lab A1 FDM 3D Printer | 21.76 x 20.83 x 12.87 inches |
| Creality K2 Plus 3D Printer | — |
| Flashforge Adventurer 5M Pro 3 | 15.75 x 14.96 x 17.83 inches |
| Bambu Lab P1S Combo 3D Printer | 15.31 x 18.03 x 15.31 inches |
| Bambu Lab P1S Enclosed FDM 3D | — |
| Creality HALOT-X1 Neo Resin 3D | 9.27 × 9.06 × 15.57 inches |
| Bambu Lab A1 mini 3D Printer w | 15.21 × 16.77 × 17.94 inches |
| Creality Ender 3 V3 SE 3D Prin | 15 × 19.6 × 15 inches |
| FLASHFORGE Adventurer 5M 3D Pr | — |
| Creality SPARKX i7 Nano Combo | — |
More Details on Our Top Picks
AOSEED AI 3D Printer for Kids
The AOSEED is the most approachable pick here for families who want kids to make toys without starting with printer setup and calibration. Its enclosed, pinch-resistant design and leveling-free platform reduce hands-on steps, while the library of more than 8,000 models and AI design tools give young creators a place to start. A built-in camera lets parents check print progress remotely. Compared with the FLASHFORGE AD5X, this printer gives up multi-color output and the faster stated peak speed, but includes eight PLA rolls and puts ease of use ahead of material flexibility. Its single-color printing means colorful figures may need separate parts and assembly, so it suits simple projects better than detailed multi-color models.
Pros:- Large model library and AI tools offer kids accessible starting points
- Enclosed, pinch-resistant design and leveling-free platform reduce setup and handling
- Built-in camera supports remote progress checks and time-lapse recording
- Includes eight rolls of PLA filament and essential tools
Cons:- Prints in one color, so multi-color designs require separate parts and assembly
- Designed around beginner-friendly use rather than the broader material options of the FLASHFORGE Creator 5 Pro
Best for: Families introducing children to 3D printing who want an enclosed machine, guided design tools, and starter filament.
Not ideal for: Makers who want multi-color prints or broader material options without assembling separate parts.
- Print speed:220–250 mm/s; up to 400 mm/s peak
- Print precision:Up to 0.05 mm
- Printing:Single-color
- Model library:More than 8,000 models across 17 design modules
- Connectivity:Wi-Fi; voice control supported
- Compatible devices:iOS, Android, and Windows
- Monitoring:Built-in camera and time-lapse recording
- Included filament:Eight rolls of PLA
- Dimensions and weight:11.42 × 10.63 × 12.2 inches; 8.82 pounds
Our verdict“Choose the AOSEED for a child-friendly introduction to making simple prints, and skip it if multi-color output is a priority.”
FLASHFORGE Creator 5 Pro 4-Toolhead 3D Printer
The Creator 5 Pro stands apart for users who need an enclosed machine built around four independent toolheads and higher-demand materials. A heated chamber reaching 65°C supports ABS, PC, and PA, while separate toolheads allow color or material changes without relying on a single nozzle to purge between them. That setup can reduce wasted filament in multi-material jobs. Compared with the Bambu Lab P2S Combo, the Creator 5 Pro specifies a warmer chamber and filtration with HEPA 13 and activated carbon; the P2S, by contrast, includes filament drying through its AMS 2 Pro. The Creator’s 600 mm/s maximum speed and seven-second tool changer are appealing, but the listing gives no build volume, making project fit harder to judge. At 39 pounds, it also needs a settled workspace.
Pros:- Four independent toolheads support multi-material and color printing with reduced purge waste
- Heated chamber reaches 65°C and supports ABS, PC, and PA
- CoreXY motion system has a stated maximum speed of 600 mm/s
- HEPA 13 and activated carbon filtration accompany camera and remote controls
Cons:- The listing does not specify build volume, so usable part size is unclear
- At 39 pounds, it is less convenient to move than a compact printer
- Its heated chamber and material support may be unnecessary for buyers printing mainly PLA
Best for: Makers who print ABS, PC, or PA and want four-toolhead color or material changes in an enclosed, filtered printer.
Not ideal for: Buyers who need a clearly stated build volume or a lightweight printer they can move between workspaces.
- Toolheads:Four independent toolheads
- Toolhead change time:Seven seconds
- Heated chamber:Up to 65°C
- Maximum print speed:600 mm/s
- Motion system:CoreXY
- Supported materials:ABS, PC, and PA
- Filtration:HEPA 13 and activated carbon
- Dimensions:16 × 14 × 18 inches
- Weight:39 pounds
Our verdict“Pick the Creator 5 Pro if engineering materials and reduced-waste multi-toolhead printing matter more than a specified build volume or portability.”
Bambu Lab P2S 3D Printer Combo with AMS 2 Pro
The P2S Combo pairs a fast FDM printer with the AMS 2 Pro, which adds multi-color and multi-material printing as well as filament drying up to 65°C. That combination is useful for people who want color changes and dry filament in one setup; automatic calibration and AI failure detection also help reduce the need to watch every print. Its 600 mm/s maximum speed matches the FLASHFORGE Creator 5 Pro on paper, while the Creator specifies four independent toolheads and a 65°C heated chamber. The P2S instead lists a chamber temperature up to 50°C and adaptive airflow, so material conditions differ. Quick-swap nozzles add flexibility, but the product data leaves build volume and supported materials unspecified. Buyers should check those details against their planned parts and filament before choosing it.
Pros:- Included AMS 2 Pro supports multi-color and multi-material printing
- AMS 2 Pro dries filament at up to 65°C
- Automatic calibration and AI failure detection support less hands-on operation
- Quick-swap nozzles and adaptive airflow add setup flexibility
Cons:- The listing does not specify build volume or supported materials
- Multi-color capability is tied to the Combo configuration
- Its stated chamber temperature is lower than the 65°C chamber on the FLASHFORGE Creator 5 Pro
Best for: Makers who want multi-color printing, built-in filament drying, and automated print monitoring in one FDM package.
Not ideal for: Buyers who need a confirmed build volume or a clear list of compatible materials before deciding.
- Printer type:FDM 3D printer
- Maximum print speed:600 mm/s
- Included system:AMS 2 Pro
- AMS filament drying:Up to 65°C
- Chamber temperature:Up to 50°C
- Calibration:Automatic
- Failure detection:AI failure detection
- Nozzles:Quick-swap nozzles
- Air management:Adaptive airflow and carbon filter
Our verdict“Choose the P2S Combo if you value integrated filament drying and multi-color capability, after confirming its size and material fit for your projects.”
Snapmaker U1 4-Toolhead 3D Printer
The Snapmaker U1 combines four independent toolheads with a 270 × 270 × 270 mm build volume, making it the clearest fit here for larger projects that need multiple colors or materials. Its tool changes take about five seconds, slightly quicker than the Creator 5 Pro’s stated seven seconds, while its maximum speed is 500 mm/s rather than 600 mm/s. The U1 also lists a wide material range, including TPU, ABS, ASA, PA, and PC, giving experienced makers more specified options than the FLASHFORGE AD5X, whose listing centers on four-color printing and a smaller 220 mm cube. That extra capacity comes with a substantial footprint and 59-pound weight. It makes more sense as a dedicated workshop machine than a printer that needs frequent relocation.
Pros:- 270 × 270 × 270 mm build volume accommodates larger parts than the FLASHFORGE AD5X
- Four independent toolheads support multi-color and mixed-material printing
- About five-second tool changes and speeds up to 500 mm/s
- Lists a broad range of materials, including TPU, ABS, ASA, PA, and PC
Cons:- Weighs 59 pounds, making it difficult to relocate
- Its 500 mm/s stated maximum is lower than the 600 mm/s listed for the AD5X
- The 22.6-inch dimension requires substantial workspace
Best for: Makers who need a larger build area for multi-color or mixed-material parts and have a permanent workspace.
Not ideal for: Apartment users or occasional makers who need a compact, easy-to-move printer for smaller projects.
- Toolheads:Four independent toolheads
- Tool change time:About five seconds
- Maximum print speed:500 mm/s
- Build volume:270 × 270 × 270 mm
- Supported materials:PLA, PVA, TPU, PETG, PCTG, ABS, ASA, PA, PC, and more
- Display:3.5-inch touchscreen
- Dimensions:22.6 × 13 × 14.2 inches
- Weight:59 pounds
- Warranty:One year
Our verdict“The U1 suits makers who need a roomy four-toolhead printer and can dedicate a stable workspace to it.”
FLASHFORGE AD5X Multi-Color CoreXY 3D Printer
The AD5X brings four-color printing and a CoreXY motion system to a 220 mm cube build area. Its stated 600 mm/s maximum speed and one-click auto leveling make it a straightforward option for makers who want to move quickly from setup to multi-color jobs. Compared with the Snapmaker U1, the AD5X is specified for a smaller build volume and does not list four independent toolheads, while the U1 offers a broader stated material range and faster tool changes. The AD5X’s 300°C direct-drive extruder and nozzle choices from 0.25 to 0.8 mm allow different balances of detail and throughput, though only the 0.4 mm nozzle is included by default. Power-loss recovery and app monitoring are practical additions; larger parts may outgrow its build space.
Pros:- Supports printing with up to four colors
- CoreXY system lists speeds up to 600 mm/s
- One-click auto leveling simplifies setup
- Power-loss recovery and Flash Maker app monitoring support unattended jobs
Cons:- 220 × 220 × 220 mm build volume limits larger projects compared with the Snapmaker U1
- Only the 0.4 mm nozzle is included by default
- The listing does not specify a heated chamber or supported materials
Best for: Makers who want four-color printing, fast CoreXY motion, and remote monitoring for projects that fit a 220 mm cube.
Not ideal for: Users printing larger parts or those who want alternate nozzle sizes included without a separate purchase.
- Printing colors:Up to four
- Maximum print speed:600 mm/s
- Acceleration:20,000 mm/s²
- Build volume:220 × 220 × 220 mm
- Extruder temperature:Up to 300°C
- Structure:CoreXY
- Nozzle sizes:0.25 mm, 0.4 mm, 0.6 mm, and 0.8 mm; 0.4 mm included
- Auto leveling:One-click
- Additional features:Print recovery, automatic filament feeding and retraction, and Flash Maker app monitoring
Our verdict“Choose the AD5X for fast, four-color printing on medium-sized parts, and look elsewhere if your projects need more build space.”
Bambu Lab A1 FDM 3D Printer
The Bambu Lab A1 is the approachable pick for new makers who want automatic setup help without giving up speed-focused features. Automatic calibration and active flow rate compensation can reduce the adjustments that often interrupt early projects, while the touchscreen and quick-swap nozzle make routine changes more accessible. It reaches 10,000 mm/s² acceleration, though the Creality K2 Plus is built for much larger prints and lists substantially higher acceleration. The A1’s multicolor option depends on the separately sold AMS lite, so its entry configuration does not provide that capability on its own. Its 21.76-inch dimension and 22-pound weight also call for a dedicated spot. I’d choose it for learning and everyday FDM prints; buyers focused on an enclosure or larger parts should look at the P1S or K2 Plus.
Pros:- Automatic calibration reduces manual setup work
- Active flow rate compensation helps manage print consistency
- Quick-swap nozzle and touchscreen simplify common tasks
- AMS lite compatibility adds a multicolor upgrade path
Cons:- AMS lite is sold separately for multicolor printing
- Open-frame design is less suited to users who need an enclosure
- Its listed dimensions require a dedicated workspace
Best for: First-time makers who want assisted calibration, a touchscreen, and a path to multicolor printing with an added AMS lite
Not ideal for: Makers who need an enclosed printer or routinely print large parts; the A1 is an open-frame model and is smaller than the Creality K2 Plus
- Printing technology:FDM
- Maximum acceleration:10,000 mm/s²
- Calibration:Automatic
- Multicolor printing:Supported with AMS lite, sold separately
- Noise level:≤48 dB
- Dimensions:21.76 x 20.83 x 12.87 inches
- Weight:22 pounds
- Model:PF002-A
Our verdict“Choose the A1 for an accessible first FDM printer with helpful automation, provided you do not need an enclosure or included multicolor hardware.”
Creality K2 Plus 3D Printer
When part size is the deciding factor, the Creality K2 Plus has a clear advantage in this group: its 350 × 350 × 350 mm build volume accommodates projects that exceed the listed 8.7-inch cube of the Flashforge Adventurer 5M Pro. A stated speed of up to 600 mm/s and 30,000 mm/s² acceleration pair that capacity with fast-motion capabilities. The printer also arrives pre-assembled, with screen installation still required, and uses dual AI cameras plus 18 sensors for automated monitoring. That feature set makes it a more ambitious machine than the beginner-focused Bambu Lab A1, but it also asks for more space and a buyer comfortable with a larger setup. Multicolor and multi-material printing require the separately sold Creality CFS, which adds an extra purchase for those workflows.
Pros:- Large 350 × 350 × 350 mm build volume
- Stated speed up to 600 mm/s with 30,000 mm/s² acceleration
- Dual AI cameras and 18 sensors support automated monitoring
- Pre-assembled design reduces initial assembly
Cons:- Creality CFS is sold separately for multicolor and multi-material printing
- Large build volume requires substantial workspace
- Screen installation is still required during setup
Best for: Makers producing large cosplay pieces, props, or functional parts who want a large build area and automated monitoring
Not ideal for: Apartment users with limited printer space or buyers expecting multicolor printing hardware in the box; the K2 Plus is large and needs a separate CFS
- Build volume:350 × 350 × 350 mm
- Maximum print speed:Up to 600 mm/s
- Acceleration:30,000 mm/s²
- Noise level:45 dB
- Monitoring:Dual AI cameras and 18 intelligent sensors
- Setup:Pre-assembled; screen installation required
- Multicolor printing:Requires Creality CFS, not included
Our verdict“Pick the K2 Plus if your projects need a much larger build area and you have room for the printer and its optional CFS.”
Flashforge Adventurer 5M Pro 3D Printer
The Flashforge Adventurer 5M Pro combines a compact enclosed format with HEPA and activated carbon filtration, giving it a distinct role for makers who want filtration included in their printer setup. Its Core XY structure, vibration compensation, and stated 600 mm/s maximum speed target quicker printing, while automatic leveling and a quick-release nozzle simplify routine jobs. The Bambu Lab P1S also offers an enclosure and supports advanced filaments, but the 5M Pro’s dual-layer filtration is its clearest point of difference. Its 8.7-inch-cube build volume is modest beside the Creality K2 Plus, so large props or functional parts may not fit. The listed 600 mm/s is a maximum capability; buyers should weigh that headline against the modest build area and nearly 40-pound weight.
Pros:- HEPA and activated carbon filtration in a dual-layer system
- Automatic leveling and vibration compensation reduce manual adjustments
- Quick-release nozzle and flexible PEI plate ease maintenance and print removal
- Filament run-out alerts and power-loss recovery support longer jobs
Cons:- 8.7-inch-cube build volume limits larger prints
- At 39.9 pounds, it is not especially portable
- Maximum speed does not change its relatively compact print capacity
Best for: Home makers who want an enclosed FDM printer with built-in dual-layer air filtration for smaller projects
Not ideal for: Makers who print oversized parts or need a lighter, easily relocated machine; its build volume is limited and it weighs 39.9 pounds
- Build volume:8.7 x 8.7 x 8.7 inches
- Maximum print speed:600 mm/s
- Maximum acceleration:20,000 mm/s²
- Nozzle flow:32 mm³/s
- Structure:Core XY with vibration compensation
- Filtration:Dual-layer HEPA and activated carbon
- Dimensions:15.75 x 14.96 x 17.83 inches
- Weight:39.9 pounds
- Model:AD5M Pro
Our verdict“Choose the Adventurer 5M Pro for an enclosed, filtered setup and smaller prints, but look to the K2 Plus for substantially larger parts.”
Bambu Lab P1S Combo 3D Printer with AMS
The Bambu Lab P1S Combo makes the strongest case here for buyers who want multicolor printing ready in the same package: its included AMS supports up to 16 colors. That sets it apart from the Creality K2 Plus and Bambu Lab A1, both of which require separately sold hardware for multicolor work. The enclosed design, automatic bed leveling, and stated 500 mm/s speed also make the P1S a versatile choice for users moving beyond basic PLA projects; listed supported filaments include ABS and ASA. Its enclosure and material range are more flexible than the A1’s open-frame approach, though the Creality K2 Plus offers a much larger build volume. Reinforced carbon- or glass-fiber filaments are not recommended, and the 47.5-pound weight makes this a substantial permanent setup.
Pros:- Included AMS supports up to 16 colors
- Enclosed design supports a range of listed advanced filaments
- Automatic bed leveling and roughly 15-minute setup
- Stated speed up to 500 mm/s with 20,000 mm/s² acceleration
Cons:- Carbon- and glass-fiber reinforced filaments are not recommended
- At 47.5 pounds, it is a heavy printer to relocate
- Its build volume is smaller than the Creality K2 Plus
Best for: Makers who want an enclosed printer with multicolor capability included and plan to print common materials such as ABS or ASA
Not ideal for: Users who need a large-format machine or plan to print carbon- or glass-fiber reinforced filaments
- Printer type:Enclosed 3D printer with AMS
- Maximum printing speed:500 mm/s
- Acceleration:20,000 mm/s²
- Multicolor printing:Up to 16 colors with included AMS
- Supported filaments:PLA, PETG, TPU, PVA, PET, ABS, ASA
- Capable filaments:PA and PC
- Dimensions:15.31 x 18.03 x 15.31 inches
- Weight:47.5 pounds
Our verdict“Choose the P1S Combo if you want an enclosure and included AMS for multicolor projects, and do not need the K2 Plus’s larger build area.”
Bambu Lab P1S Enclosed FDM 3D Printer
The Bambu Lab P1S is the straightforward enclosed option for buyers who want the printer’s core platform without an AMS in the package. It pairs automatic bed leveling and setup in about 15 minutes with a stated maximum speed of 500 mm/s. Its enclosure and listed filament range—including ABS and ASA—make it a more suitable choice for those materials than the open-frame Bambu Lab A1. The tradeoff is that multicolor printing depends on a separate Bambu Lab AMS, while the P1S Combo includes one and supports up to 16 colors. The P1S also shares the Combo’s stated restriction against carbon- and glass-fiber reinforced polymer. It fits buyers who value an enclosed machine and will print mostly single-color parts; multicolor shoppers should compare the Combo before choosing.
Pros:- Fully enclosed design supports a range of listed filaments
- Automatic bed leveling reduces manual setup
- About 15-minute setup time
- Stated speed up to 500 mm/s and acceleration of 20,000 mm/s²
Cons:- Bambu Lab AMS is required and sold separately for multicolor printing
- Carbon- and glass-fiber reinforced polymer is not recommended
- The P1S Combo includes AMS for buyers who want multicolor capability from the start
Best for: Makers upgrading to an enclosed FDM printer for mostly single-color projects with materials such as ABS or ASA
Not ideal for: Buyers who want multicolor printing ready out of the box or need to print carbon- or glass-fiber reinforced polymer
- Printer type:FDM 3D printer
- Design:Fully enclosed
- Maximum print speed:500 mm/s
- Acceleration:20,000 mm/s²
- Multicolor printing:Up to 16 colors with Bambu Lab AMS, required and sold separately
- Setup time:About 15 minutes
- Ideal filaments:PLA, PETG, TPU, PVA, PET, ABS, ASA
- Capable filaments:PA and PC
Our verdict“Choose the P1S if you want an enclosed printer for single-color work and prefer to add AMS only if your needs change.”
Creality HALOT-X1 Neo Resin 3D Printer
Fine resin detail is the HALOT-X1 Neo’s main reason to choose it: its 9K LCD and 18 μm XY resolution suit miniature makers who want crisp small features. A factory pre-leveled platform also cuts down on an early setup hurdle, while USB, WiFi, and Creality Cloud provide several ways to send files. Compared with the filament-based Ender 3 V3 SE, this resin model is aimed at finer surface detail, but its 153.36 × 77.76 × 160 mm build area is much less suited to larger objects. The AI image-to-model tool may help spark projects, though generation can take up to 3.5 hours. Choose it for small, detailed prints; skip it if you need a roomy build area or mainly want to print larger functional parts.
Pros:- 9K LCD and 18 μm XY resolution support fine model detail
- Factory pre-leveled platform simplifies initial setup
- USB, 2.4 GHz WiFi, and Creality Cloud file transfer
- Compatible with HALOT BOX, CHITUBOX, and Lychee Slicer
Cons:- Compact build volume restricts model size
- AI model generation can take up to 3.5 hours
- Resin printing is a different fit from the Ender 3 V3 SE’s filament workflow
Best for: Miniature makers and hobbyists prioritizing fine detail in small resin models
Not ideal for: Buyers who need to print large objects or prefer a larger build area for functional parts
- Display:6.8-inch 9K LCD
- Display resolution:8520 × 4320
- XY resolution:18 μm
- Build volume:153.36 × 77.76 × 160 mm
- Layer thickness:0.01–0.2 mm
- Connectivity:USB, 2.4 GHz WiFi, Creality Cloud
- Compatible slicers:HALOT BOX, CHITUBOX, Lychee Slicer
- Dimensions:9.27 × 9.06 × 15.57 inches
Our verdict“Choose the HALOT-X1 Neo for detailed small resin models, and look to the Ender 3 V3 SE for a filament printer with broader part-making use.”
Bambu Lab A1 mini 3D Printer with LED Lamp Kit
The A1 mini’s standout advantage is its included LED Lamp Kit, which gives beginners a focused first project and a reason to explore decorative prints. Automatic calibration reduces setup work, and the MakerWorld library and Bambu Handy app make finding and sending models more approachable. Its stated noise level of ≤48 dB also makes it a plausible fit for a home or studio where printer noise matters. Compared with the FLASHFORGE Adventurer 5M, whose appeal centers on very high stated print speed and a 220 mm cube build area, this bundle leans toward accessible creative projects. The A1 mini is compact, though, and the lamp kit is intended for compatible lamp models rather than every design. Pick it for approachable decor projects; choose a larger-format option for bigger prints.
Pros:- Automatic calibration reduces setup steps
- LED Lamp Kit supports decorative lamp projects
- MakerWorld and Bambu Handy app provide model access and connectivity
- Stated noise level of ≤48 dB suits noise-conscious home or studio use
Cons:- Compact format can limit project size
- Lamp kit is intended for compatible lamp models
- Provided specs do not state the build volume or print speed
Best for: First-time makers who want guided access to printable models and a lamp project to start with
Not ideal for: Makers planning large prints or buyers who do not expect to use compatible lamp models
- Included accessory:LED Lamp Kit
- Calibration:Automatic
- Noise level:≤48 dB
- Model access:MakerWorld
- App:Bambu Handy
- Dimensions:15.21 × 16.77 × 17.94 inches
- Weight:12.1 pounds
- Model number:PF002-M-EU
Our verdict“Choose the A1 mini bundle for a beginner-friendly route into small decorative lamp prints, and consider the Adventurer 5M when a stated larger build area matters more.”
Creality Ender 3 V3 SE 3D Printer
With support for PLA, PETG, and TPU, the Ender 3 V3 SE covers a useful mix of everyday and flexible filament projects. Its Sprite Direct Drive extruder suits TPU more directly than a setup centered on rigid filament, while CR Touch leveling and automatic Z-offset calibration reduce bed setup chores. The flexible PC spring steel plate also makes finished prints easier to remove. Against the resin-based HALOT-X1 Neo, this Creality is the more practical fit for varied filament parts, while the HALOT is better aimed at fine miniature detail. Its stated speed reaches 250 mm/s, but results depend on compatible materials and recommended settings, so that figure alone does not promise a finished-part outcome. Choose it for a versatile entry into filament printing; skip it if resin detail is your priority.
Pros:- Supports PLA, PETG, and TPU
- Sprite Direct Drive extruder suits flexible filament
- CR Touch leveling includes automatic Z-offset calibration
- Flexible PC spring steel plate helps with print removal
Cons:- Print results depend on compatible materials and recommended settings
- Up to 250 mm/s is a maximum figure, not a guarantee of print quality
- Less suited to fine resin detail than the HALOT-X1 Neo
Best for: New filament users who want to print with PLA, PETG, and TPU, including flexible parts
Not ideal for: Miniature makers focused on very fine resin detail or buyers seeking a resin workflow
- Print speed:Up to 250 mm/s
- Acceleration:2500 mm/s²
- Supported filaments:PLA, PETG, TPU
- Leveling:CR Touch auto leveling with automatic Z-offset calibration
- Extruder:Sprite Direct Drive
- Motion system:Dual synchronized Z-axis lead screws and Y-axis linear shafts
- Build plate:Flexible PC spring steel
- Dimensions:15 × 19.6 × 15 inches
Our verdict“Choose the Ender 3 V3 SE for accessible filament variety and TPU capability, while miniature makers should favor the HALOT-X1 Neo’s resin detail.”
FLASHFORGE Adventurer 5M 3D Printer
The Adventurer 5M is the speed-focused option here, pairing a CoreXY structure with a stated maximum of 600 mm/s and vibration compensation. Automatic bed leveling, a 35-second warm-up to 200°C, and a quick-change nozzle are aimed at reducing setup and changeover time. Its 220 × 220 × 220 mm print area gives it room for substantial hobby projects, while the dual-sided PEI plate offers two build surfaces. Compared with the Ender 3 V3 SE, the 5M’s stated speed and CoreXY design target faster production; the Ender instead spells out support for TPU alongside PLA and PETG. Some nozzle sizes are optional, and the product details say little about noise or reliability. It suits speed-minded makers who value workflow features, but those needing confirmed material breadth should check compatibility before choosing.
Pros:- CoreXY structure with stated speed up to 600 mm/s
- Automatic bed leveling and vibration compensation
- Dual-sided PEI build platform
- Quick-change nozzle and 35-second warm-up to 200°C
Cons:- Some nozzle sizes are optional rather than included
- Product details do not specify noise or reliability
- Material support is less clearly stated than on the Ender 3 V3 SE
Best for: Hobbyists who want a fast CoreXY filament printer for repeat projects within a 220 mm cube
Not ideal for: Buyers who need specified TPU support, detailed noise information, or every nozzle size included
- Print size:220 × 220 × 220 mm
- Maximum printing speed:600 mm/s
- Acceleration:20,000 mm/s²
- Extruder temperature:Up to 280°C
- Nozzle flow rate:32 mm³/s
- Nozzle change time:3 seconds
- Warm-up time:35 seconds to 200°C
- Structure:CoreXY, all-metal
Our verdict“Choose the Adventurer 5M if speed and quick workflow changes lead your priorities, and favor the Ender 3 V3 SE when explicit TPU support matters more.”
Creality SPARKX i7 Nano Combo Multi-Color 3D Printer
The SPARKX i7 Nano Combo centers on up to four-color printing and filament handling that can reduce interruptions during longer jobs. It automatically loads and retracts filament, detects breakage, tangles, or an empty feed, and can switch to a matching backup spool when the current one runs out. Its 260 × 260 × 255 mm build area is larger than the Adventurer 5M’s 220 mm cube, giving projects more room while adding multi-color capability. The tradeoff is that automatic refill depends on a matching backup spool, and the supplied details do not state print speed or supported materials. That makes it harder to judge how it fits a speed-sensitive or material-specific workflow. Choose it for color changes and feed monitoring; the Adventurer 5M is easier to compare if stated speed is your deciding factor.
Pros:- Supports up to four filament colors
- Automatically loads and retracts filament
- Detects filament breakage, tangling, and empty feed, then pauses printing
- Automatically switches to a matching backup spool
Cons:- Automatic refill requires a matching backup spool
- Product details do not provide print speed
- Supported materials are not specified
Best for: Makers creating multi-color filament prints who value automatic feed monitoring and backup-spool switching
Not ideal for: Buyers who need stated print speeds or confirmed material compatibility before selecting a printer
- Build volume:260 × 260 × 255 mm
- Multi-color printing:Up to 4 colors
- Filament monitoring:Detects breakage, tangling, and empty feed
- Filament refill:Automatically switches to a matching backup spool
- Filament handling:Automatic feed and retract
Our verdict“Choose the SPARKX i7 Nano Combo for automated four-color jobs and feed monitoring, and choose the Adventurer 5M if stated speed specifications are central to your decision.”

How We Picked
I compared these 15 printers by the jobs they are built to handle: everyday FDM parts, multicolor models, large prints, child-friendly projects, and high-detail resin work. Ranking factors included print format, enclosure and build size, material-handling approach, setup demands, maintenance needs, and how broadly each machine can serve a typical buyer. A printer’s role matters as much as its feature list: a compact beginner model should not be judged by the same priorities as a large-format or resin machine.
The order favors useful capability with manageable tradeoffs for a broad range of home and hobby projects. The P2S Combo leads for its mix of enclosure and automated material handling; the A1 is a more straightforward open-frame alternative, while specialized toolhead, large-format, resin, and kids’ models rank according to their narrower audiences. I also weighed whether a feature changes the buyer’s workflow enough to justify its added space, upkeep, or complexity.
Factors to Consider When Choosing 3d Printers
Before choosing a 3D printer, decide what you want to make and how much time you want to spend managing the process. These broader questions can prevent a mismatch that a printer’s headline features may not reveal.
Choose FDM or Resin by the Object You Want
FDM printers lay down filament and suit brackets, organizers, toys, enclosures, and larger objects. Resin machines can capture fine surface detail for miniatures and intricate display pieces, but the finished parts need washing and curing. That extra handling affects where you can work and how you store materials and waste. A common mistake is choosing resin for its detail without accounting for the full cleanup routine. If your projects mix functional parts with occasional decorative models, consider whether the detail gain justifies maintaining two workflows. Pick the process around your most frequent finished object, not the most impressive demo print.
Size the Build Area Around Real Projects
Build volume determines the largest single piece you can print, but it does not set a limit on the size of every project: large designs can often be split into sections and joined. A bigger printer takes more room and can make long prints a larger commitment. Measure the machine’s footprint with room for access, ventilation, filament, and maintenance rather than relying on the listed build dimensions alone. If you mostly make small parts, a large-format model may sit unused while taking up valuable workspace. Check the dimensions of a few projects you actually expect to print, then decide whether splitting them is acceptable. That simple exercise can prevent buying capacity you rarely use.
Treat Multicolor Printing as a Workflow Choice
Multicolor printing can add visual detail without painting, but it may add setup steps, material changes, and purge waste. Systems that feed several filaments through one printhead and systems that use multiple toolheads handle those changes differently, so color count alone does not predict convenience. Ask whether your designs need color boundaries, multiple materials, or just a single filament. For a few accent colors, painting or separate assembled parts may use less material and involve less setup. Buyers who print color-rich figures or labels regularly may welcome automation despite its overhead. Consider your typical model, not a printer’s maximum advertised palette.
Decide How Much Setup You Want to Own
Some printers aim to automate calibration and material handling, while others leave more decisions to the owner. More control can help when tuning a machine or adapting it to unusual projects, but it also asks for time and patience. For a first printer, look at the complete path from assembly and calibration through slicing, loading filament, and removing a finished print. A fast first setup does not guarantee a low-maintenance experience over months of use. Check whether replacement parts and routine cleaning seem manageable for your space and schedule. If learning printer mechanics is part of the hobby, that involvement may be a benefit rather than a burden.
Match the Enclosure to Materials and Your Space
An enclosure can help manage drafts and temperature around a print, and it can keep moving parts less exposed in a shared room. It does not by itself make every material suitable for every workspace, and resin printers require their own handling and cleanup planning. Before buying, check the manufacturer’s material guidance and think through airflow, noise, access, and where fumes or odors could travel. An enclosed printer may be a better fit for some materials, but adds bulk and can make the machine less open to casual access. For basic filament projects in a dedicated hobby area, an open-frame model may be easier to reach and maintain. Let your planned materials and room layout settle the question.
Plan for Filament, Waste, and Maintenance
The printer is only one part of the ongoing workflow: filament storage, nozzle care, bed cleaning, and failed prints all affect how convenient ownership feels. Multicolor systems may discard material during changes, while resin work creates used wash liquid and contaminated cleanup supplies. Think about where consumables will live and how often you are willing to perform routine care. A lower-complexity single-color workflow can be a better fit for occasional projects than an elaborate system that needs regular attention. Buyers who print often may value accessible parts and a clear maintenance routine more than another headline feature. Include these recurring tasks in your decision before committing to a printer format.
Frequently Asked Questions
Should I choose an enclosed printer if this is my first 3D printer?
Choose an enclosure based on your materials, room, and project plans rather than assuming every beginner needs one. It can help limit drafts and keep the print area less exposed, but it adds space requirements and does not remove the need to learn printer basics. An open-frame machine can be easier to access for routine tasks and suit common filament projects. Check the printer’s material guidance and consider where it will sit before deciding. If you expect to use materials that benefit from a controlled environment, an enclosed model may leave more room to grow.
Is a multicolor printer worth it if I mostly print functional parts?
Usually, color automation pays off most when color is part of the design, such as labels, signs, or figures. For brackets and replacement parts, strength, fit, and material choice often matter more than appearance. Multicolor printing can use extra filament during changes and add setup decisions, so occasional color accents may be easier to paint or assemble separately. Think about how many of your planned models genuinely need several colors. If that share is small, a capable single-color printer may serve you better.
Can one printer handle both detailed miniatures and practical household parts?
One FDM printer can make both, but it may not capture the fine surface detail possible with resin. Resin excels at small, intricate models, while FDM is often more convenient for larger parts and everyday utility objects. The tradeoff is a different cleanup and material-handling routine for resin. If miniatures are occasional, an FDM printer may be the simpler all-purpose choice. If miniature detail is central to your hobby, a dedicated resin setup may be worth the extra workflow.
How much build volume do I need if I can split large models?
Splitting a model can make a smaller printer practical for many large projects, but it adds design and assembly work. Seams may need sanding, glue, or alignment features, and the finished object can be less robust at its joints. A larger build area makes single-piece prints possible, which matters for objects that need a continuous surface or strong structure. Look at the biggest items you expect to make and decide how comfortable you are joining sections. Buy for those actual projects rather than occasional hypothetical oversized prints.
What should I budget time for beyond the print itself?
Plan time for model preparation, slicing, loading material, print removal, and occasional calibration or cleaning. Multicolor jobs can take added time for material changes, and resin jobs require washing and curing after printing. A failed print can also mean diagnosing adhesion, settings, or material issues before trying again. These steps vary by printer and project, so a short print is not always a quick end-to-end job. If you want a low-effort routine, prioritize a workflow you can repeat comfortably over a machine with the most elaborate feature set.
Conclusion
For the broadest mix of home and hobby projects, I recommend the Bambu Lab P2S Combo as the best overall pick, with the Bambu Lab A1 as a simpler open-frame alternative. The A1 is also my value-minded choice for buyers who do not need an enclosure or bundled multicolor system. Beginners who want a contained, accessible filament printer should compare the Flashforge Adventurer 5M Pro with the A1 based on their room and material plans. For large projects, the Creality K2 Plus is the specialist; for four-toolhead multicolor workflows, look at the FLASHFORGE Creator 5 Pro or Snapmaker U1. Choose the Creality HALOT-X1 Neo for detailed resin models, and the AOSEED AI 3D Printer for Kids when a child-focused setup is the priority. Match the printer to the work you expect to do most often, and its tradeoffs will be easier to live with.
Fall Picks
fall essentials
As an affiliate, we earn on qualifying purchases.