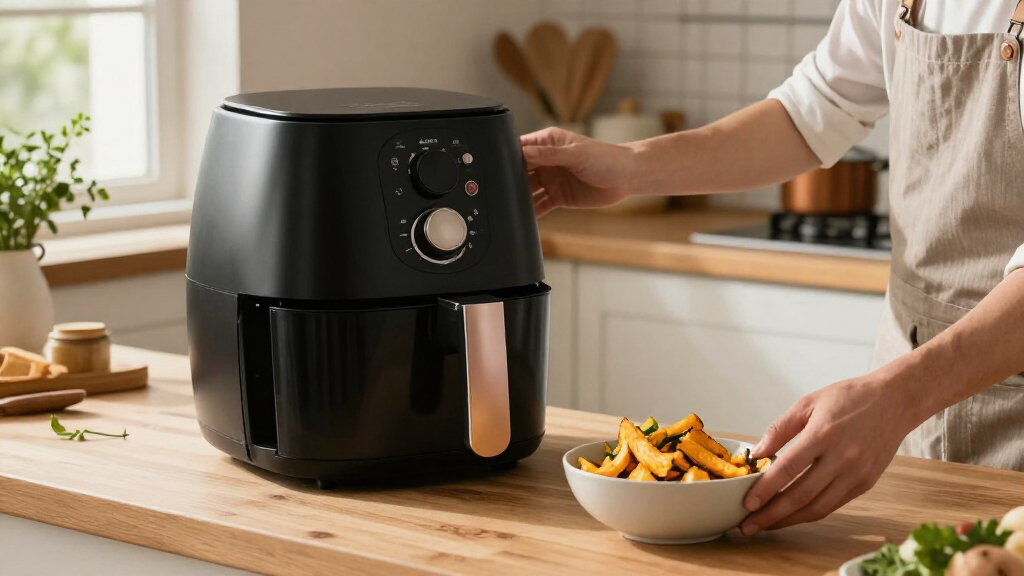

Use this guide to cook food with an air fryer that offers presets such as fries, chicken, vegetables, or fish. You’ll learn how to match a preset to your food, adjust it when needed, and check the result before serving. It is for beginners using a countertop air fryer with preset buttons or a preset menu. Allow about 20–45 minutes, depending on the recipe and whether the appliance needs preheating.

Get kitchen gear delivered free with Prime
- Fast, free delivery on millions of items
- Prime Video, Amazon Music and more included
- Member-only deals all year

CHEFMAN Multifunctional Digital Air Fryer+ Rotisserie, Dehydrator, Convection Oven, 17 Touch Screen Presets, 10L
- ✔ Preset count: 17 touch-screen presets
- ✔ Capacity: 10 quarts (10 liters stated in description)
- ✔ Wattage: 1700 watts
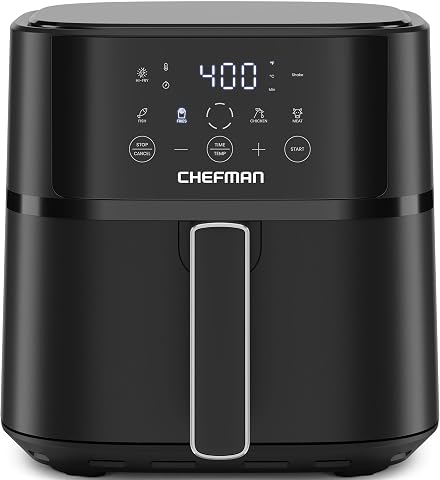
Chefman Air Fryer 6 QT Compact Airfryer with Hi-Fry Technology and 4 Presets
- ✔ Preset count: 4
- ✔ Capacity: 6 quarts
- ✔ Wattage: 1700 watts

4L Large Glass Air Fryer with Multiple Preset Cooking Modes
- ✔ Preset modes: Multiple; count and names not specified
- ✔ Capacity: 4 liters (135.27 oz stated)
- ✔ Wattage: 900 watts
Difficulty: Beginner | Time: 20–45 minutes, depending on the food
What You’ll Need
Tools & Materials:
- Air fryer with preset programs
- Food suitable for air frying
- Tongs or a heat-safe utensil
- Food thermometer for meat, poultry, or fish
Knowledge:
- Basic ability to operate the air fryer’s controls
- Ability to follow the food packaging or recipe directions
Read the air fryer manual before using it, especially for basket limits, preheating, and cleaning. Preset names and settings vary by model. Use the food package or a trusted recipe as your starting point, and check meat or fish with a food thermometer rather than relying on appearance alone.
CHEFMAN Multifunctional Digital Air Fryer+ Rotisserie, Dehydrator, Convection Oven, 17 Touch Screen Presets, 10L
For buyers who want presets to cover more than the usual fries-and-chicken routine, the CHEFMAN Multifunctional Digital Air Fryer+ is the most capable match in this lineup. Its 17 touch-screen presets are paired with air frying, roasting, baking, dehydration, and rotisserie functions, so the programs serve a genuinely broader countertop role. The 10-quart capacity and three airflow racks also make batch cooking more plausible than in the 4L glass model or the 6-quart basket fryer.The oven-style layout has a different rhythm from a pull-out basket. Multiple racks can help prepare more food at once, and the large window and interior light let us check progress without opening the door. That is useful when monitoring a rotisserie or dehydrating food, but a window does not remove the need to manage rack placement and cooking time. At 1700 watts and up to 400°F, it offers substantial stated power, although the listed maximum is lower than the 6-quart Chefman’s 450°F Hi-Fry finish.This is our top pick for households that will use the extra modes and capacity. Buyers who mainly want a quick basket of frozen snacks may find its accessory-rich oven format more appliance than they need; the 6-quart model is simpler and adds a hotter finishing setting. The provided description also does not list what each of the 17 presets does, so shoppers seeking a specific named program should confirm that before buying.
Pros:
- 17 touch-screen presets are the highest clearly stated count in this comparison.
- Combines air frying with roasting, baking, dehydration, and rotisserie.
- 10-quart chamber and three airflow racks support larger batches.
- Window, interior light, and removable drip tray support monitoring and cleanup.
Cons:
- Its oven-style footprint and multiple accessories may take more storage and setup than a basket fryer.
- The listed maximum temperature is 400°F, below the 6-quart model’s 450°F Hi-Fry finish.
- The supplied details do not name the individual preset programs.
Best for: Households that want many preset options, room for batch cooking, and oven-style functions such as rotisserie and dehydration.
Not ideal for: Buyers with limited counter space or those who mainly cook simple basket meals and do not need extra cooking modes.
Bottom line: Choose the CHEFMAN Multifunctional when preset variety and oven-style versatility matter more than a compact, single-basket routine.
“Choose the CHEFMAN Multifunctional when preset variety and oven-style versatility matter more than a compact, single-basket routine.”
Chefman Air Fryer 6 QT Compact Airfryer with Hi-Fry Technology and 4 Presets
When we want preset convenience for familiar weeknight foods rather than a countertop oven with many modes, the Chefman 6-quart makes a clear case. Its four presets are a smaller set than the 17 on the larger CHEFMAN Multifunctional, but the compact basket format is easier to understand: choose a one-touch program or set time and temperature on the touchscreen. The 6-quart capacity is listed for serving three to five people, giving it a useful middle ground between the 10-quart oven and the 4L glass model.Its distinctive feature is 450°F Hi-Fry technology, which raises the heat during the final two minutes for extra crisping. That finishing step gives this model a specific advantage for fries and tenders, while the larger oven offers more kinds of cooking overall. A halfway shake notification is another practical cue for basket foods, and the dishwasher-safe basket and rack reduce cleanup work. The supplied details do not specify the names of the four presets, so we should not assume they cover particular dishes.This is the best fit for shoppers who value a focused preset panel, a slim footprint, and crisping control. It is less compelling if our goal is the widest set of automated cooking modes or a see-through chamber: the 10-quart CHEFMAN has broader functions, and the glass model lets us see food as it cooks. With no window and a single basket, this model keeps the routine straightforward, but it cannot match the oven-style flexibility of the top-ranked pick.
Pros:
- Four presets provide quick one-touch options alongside manual controls.
- 450°F Hi-Fry finish is designed to add extra crunch at the end of cooking.
- Shake notifications prompt a mid-cycle check for basket foods.
- Dishwasher-safe basket and rack simplify cleanup.
Cons:
- Four presets are fewer than the 17 on the larger CHEFMAN Multifunctional.
- No viewing window is listed, unlike the oven and glass designs.
- The supplied details do not identify the four preset programs.
Best for: Small to mid-sized households that cook familiar basket-style meals and want simple presets with an extra-crisp finishing option.
Not ideal for: Cooks who want many named cooking modes, rotisserie or dehydration, or a window for checking food without opening the basket.
Bottom line: Pick this Chefman for a straightforward 6-quart basket and crisping-focused convenience rather than maximum preset breadth.
“Pick this Chefman for a straightforward 6-quart basket and crisping-focused convenience rather than maximum preset breadth.”
4L Large Glass Air Fryer with Multiple Preset Cooking Modes
The 4L Glass Air Fryer takes a different approach to preset cooking: it pairs a compact chamber with a visible glass cooking area, so we can keep an eye on food as it cooks. Its listing describes multiple preset modes, plus adjustable temperature and time, but does not give a preset count or name the programs. That makes it harder to compare its automation directly with the two Chefman models, whose stated counts are 17 and four.At 4 liters and 900 watts, this is the smallest-capacity option here and has substantially lower listed power than either Chefman. The compact size may appeal where counter space is limited, but it is not the strongest fit for large family batches: the 10-quart CHEFMAN offers much more stated room, while the 6-quart basket is positioned for three to five servings. The glass chamber’s visibility is a useful distinction, though the provided details do not describe its cleaning process or explain whether the appliance’s 24-hour delay start is configurable for all programs.Manual settings offer a broad stated timer span of up to 120 minutes and a temperature ceiling of 374°F, letting cooks adapt beyond the presets. The listed minimum temperature differs between the product description and specification details, so we report the stated range cautiously. This model suits buyers who prioritize visibility and a smaller chamber; skip it if a quantified preset lineup, higher stated wattage, or a large-batch oven format is the priority.
Pros:
- Visible glass chamber makes it easier to check food during cooking.
- Multiple preset modes are paired with adjustable time and temperature.
- 4-liter capacity and compact listed dimensions suit smaller kitchens.
- Memory function resumes the program after the basket is reinserted.
Cons:
- The provided information does not state how many presets there are or name them.
- 900 watts is lower than the 1700 watts listed for both Chefman models.
- The 4-liter capacity is smaller than the other two options.
Best for: Space-conscious cooks who want to see food through a glass chamber and have manual time and temperature adjustments alongside preset modes.
Not ideal for: Larger households or buyers who need a clearly documented preset count, higher stated wattage, or large-batch capacity.
Bottom line: Choose the glass model for visibility and a compact footprint, provided its unspecified preset lineup meets your needs.
“Choose the glass model for visibility and a compact footprint, provided its unspecified preset lineup meets your needs.”
As an Amazon Associate we earn from qualifying purchases.
Before You Start
Place the air fryer on a stable, heat-resistant surface with clear space around its vents. Keep the basket below its fill line and avoid blocking airflow with foil or baking paper. Presets are starting programs; food size, amount, starting temperature, and appliance model can change the cooking time. Do not leave the appliance unattended while cooking.
Step-by-Step Instructions
Step 1: Choose food that fits the preset
Check the preset labels and select the one closest to your food, such as fries for frozen or cut potatoes, chicken for chicken pieces, or vegetables for vegetables. If the exact food is not listed, choose a similar food with a comparable size and texture, then use the recipe or package directions to guide the time and temperature.
Tip:A preset may be designed for a particular form of food. A whole chicken and small wings may both fall under “chicken,” but they need different cooking times.
Check: You have identified a preset that matches the food type and have a recipe or package direction available as a reference.
Step 2: Prepare and portion the food
Cut food into pieces of similar size so it cooks at a similar rate. Pat wet ingredients dry, and add only a light coating of oil when the recipe calls for it. Separate pieces that are frozen together if the directions allow, and remove packaging before cooking.
Tip:Do not add loose batter or excess oil to the basket. It can drip, smoke, or cook unevenly.
Check: The pieces are reasonably uniform, ready to cook, and free of packaging or excess moisture.
Step 3: Load the basket without crowding
Place food in a single layer where possible, leaving space for hot air to circulate. Cook in batches if pieces overlap heavily or cover most of the basket. Return the basket fully to the appliance.
Tip:For foods such as fries, a little overlap is manageable if you shake the basket during cooking. Dense piles can remain pale or soft in the middle.
Check: Air can move around the food, and the basket is below the appliance’s fill line.
Step 4: Set the preset and review its settings
Select the closest preset, then check the displayed temperature and cooking time before starting. Compare them with the food package or recipe. Adjust the controls if the preset differs substantially from those directions or if you are cooking a smaller or larger amount than the preset expects.
Tip:Some models start as soon as you press a preset; others wait for a start button. Read the display and manual so you know when the countdown begins.
Check: The display shows a time and temperature suitable for the food and portion size.
Step 5: Preheat if the recipe or manual calls for it
Run the appliance empty for the stated preheat period if your recipe or manual recommends preheating. If the preset includes preheating, follow the display prompts and wait for the signal before adding food.
Tip:Do not assume every model needs preheating. Adding food at the wrong point can affect timing, so follow your appliance’s instructions.
Check: The appliance has reached the point at which its directions say to add the food.
Step 6: Start cooking and turn or shake as needed
Start the program and set a timer if you need one. About halfway through, pull out the basket carefully and shake it or turn the food with tongs when the recipe calls for it. Push the basket back in promptly so cooking can continue.
Tip:Hot air and the basket can cause burns. Use the handle, keep your face back from escaping steam, and place the basket on a heat-safe surface.
Check: The food has been redistributed or turned where needed, and the air fryer has resumed cooking.
Step 7: Check doneness before serving
When the program ends, inspect the food and test the thickest pieces. For meat, poultry, or fish, use a food thermometer and follow the safe internal temperature recommended by a trusted food-safety authority. If the food needs more time, cook it in short increments and check again.
Tip:Presets cannot confirm that the center of a thick piece has reached a safe temperature. Do not serve based on browned edges alone.
Check: The food has the expected texture and color, and any required thermometer reading meets the recommended safe temperature.
Step 8: Serve food and clean the appliance safely
Transfer cooked food with tongs or a heat-safe utensil. Switch off and unplug the appliance if your manual directs you to do so. Let the basket and tray cool, then clean them according to the manufacturer’s instructions.
Tip:Do not immerse the appliance body or heating element in water. Avoid abrasive tools that can damage a nonstick coating.
Check: The food is served, and the cooled basket and tray are clean and ready for the next use.
Common Mistakes to Avoid
- Treating the preset time as exact for every quantity and appliance. — Use the preset as a starting point, compare it with recipe or package directions, and check the food before serving.
- Overfilling the basket. — Leave space for airflow and cook in batches when food forms a dense pile.
- Choosing a preset by name without checking the food’s size or form. — Match the preset to the actual item and portion; adjust time based on reliable cooking directions.
- Serving meat or fish based only on its appearance. — Measure the thickest part with a food thermometer and follow safe-temperature guidance.
Troubleshooting
Problem: Food is browned outside but undercooked inside.
Solution: Reduce the batch size, lower the temperature if the exterior is browning too quickly, and continue cooking in short intervals. Check the center with a thermometer when appropriate.
Problem: Food is pale or soft after the preset ends.
Solution: Spread the pieces out, shake or turn them, and cook for a few more minutes. Next time, avoid crowding and check whether the recipe calls for a hotter setting or preheating.
Problem: The air fryer smokes during cooking.
Solution: Stop the appliance and check for excess oil, food residue, or fatty drippings in the tray. Clean cooled components according to the manual before using it again.
Problem: The preset starts with an unexpected time or temperature.
Solution: Pause or cancel the program, consult the manual for that preset, and enter the recipe’s suitable settings manually if the model allows it.
What Success Looks Like
The food is cooked through, has the texture and browning you intended, and meets safe internal temperature guidance when applicable. The air fryer basket was not overcrowded, the controls were checked before cooking, and the appliance has been cleaned according to its manual after cooling.
Next Steps
Record settings that worked for the same food, portion, and air fryer model. Use those notes as a starting point next time, while still checking doneness. Clean the basket and tray after each use, and inspect vents and the heating area for residue as directed in the manual.
Frequently Asked Questions
Can I trust the preset time without checking the food?
Use the preset as a starting point, then check the food. Portions, thickness, starting temperature, and appliance models affect how quickly food cooks.
Should I preheat an air fryer before using a preset?
Follow the manual and recipe. Some programs include preheating, while some models and foods do not require it.
What should I do if my food does not have its own preset?
Choose a preset for a similar food type, then use package or recipe directions to guide the settings. Check the food during cooking and adjust in short increments.
Can I cook two different foods with separate presets at once?
Only if your appliance has separate cooking zones or its manual supports cooking different foods together. A single basket usually runs one program, so foods with different time or temperature needs may finish unevenly.
How often should I shake or turn food?
Follow the recipe and appliance guidance. For small items such as fries or vegetables, one shake partway through often helps them cook evenly; delicate or large pieces may need turning with tongs instead.