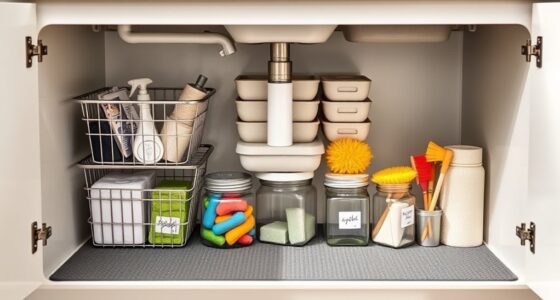
To properly clean and maintain your robotic vacuum, regularly empty and replace the dustbin, clean brushes and rollers, and check filters for dirt or damage. Wipe sensors and cameras with a soft cloth, inspect wheels and casters for debris, and keep firmware and app settings updated. Establish a routine schedule for inspections and cleaning tasks to guarantee peak performance. If you follow these steps, your vacuum will stay in top shape—more tips await upon continuing.
Key Takeaways
- Regularly empty and clean the dustbin and filters to maintain suction and air quality.
- Remove hair and debris from brushes, rollers, and wheels; wash and dry components thoroughly.
- Wipe sensors and cameras with a soft cloth to ensure accurate navigation and obstacle detection.
- Check and update firmware, app settings, and calibrate the battery for optimal device performance.
- Establish a routine schedule for inspecting and maintaining filters, brushes, sensors, and other components.
Emptying and Replacing the Dustbin
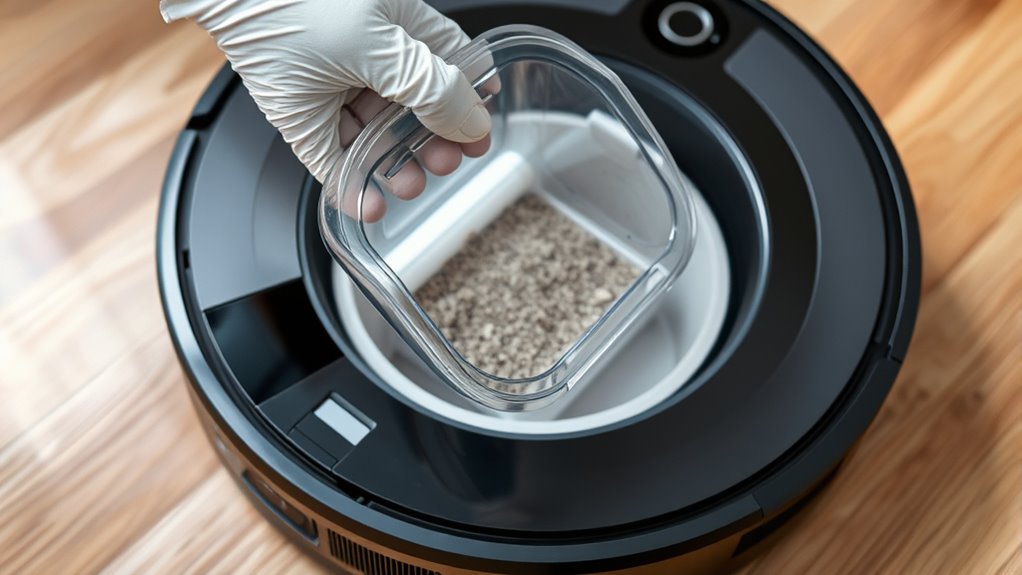
To keep your robotic vacuum operating efficiently, it’s essential to regularly empty and replace the dustbin. Proper dustbin disposal prevents clogs and maintains suction power. Check the dust capacity often—once it’s about three-quarters full, it’s time to empty it. Open the dustbin compartment, carefully remove the bin, and dispose of the debris into your trash. Avoid overfilling it, as a full dustbin can hinder performance. Clean the dustbin with a damp cloth if needed, ensuring no dust or debris remains on the filters or walls. Reinsert the dustbin securely to prevent leaks or errors during operation. Regularly managing dust capacity and proper disposal keeps your vacuum running smoothly, extending its lifespan and ensuring ideal cleaning results every time. Paying attention to the dustbin’s filter maintenance can further improve the vacuum’s efficiency and longevity. Additionally, ensuring the dustbin’s seals are intact helps maintain optimal suction and prevents dust leakage. Keeping the dustbin clean and well-maintained is crucial for consistent cleaning performance. Incorporating routine checks of airflow around the unit can also enhance overall cleaning efficiency. Implementing these best practices can help prevent potential clogs and blockages, ensuring your robot vacuum continues to perform at its best.
Cleaning the Brushes and Rollers
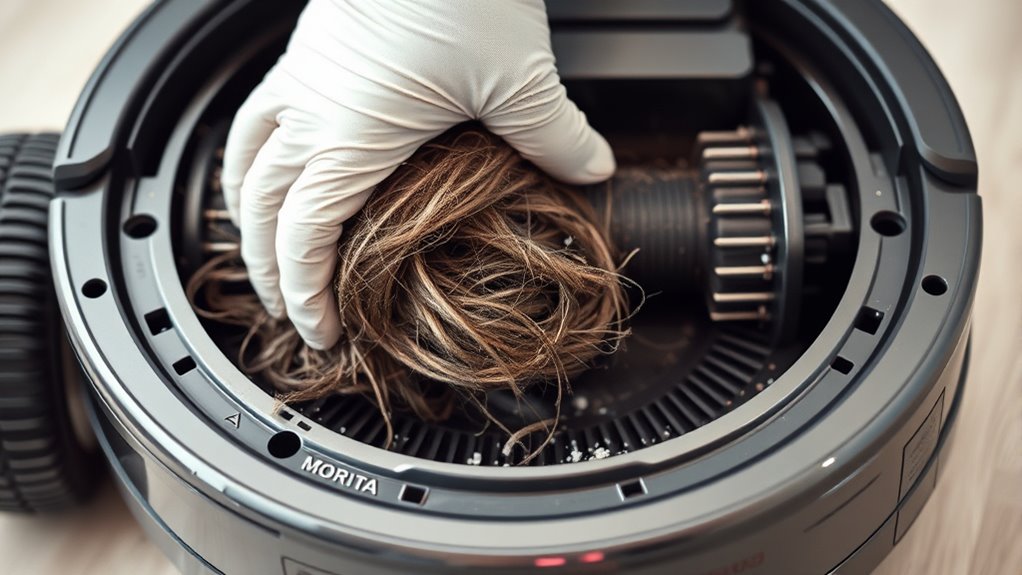
Regularly cleaning the brushes and rollers is essential for maintaining your robotic vacuum’s efficiency. Start by removing any hair, string, or debris wrapped around the brush bristles, which can hinder performance. Conduct regular brush maintenance by using a cleaning tool or a small comb to clear buildup. For roller cleaning, detach the rollers as per your vacuum’s instructions and wash them with warm water, removing any trapped debris or hair. Make sure they’re completely dry before reinstalling. This not only prevents clogging but also guarantees thorough cleaning with each pass. Keeping the brushes and rollers free of obstructions helps your vacuum operate at peak performance, extends its lifespan, and maintains ideal suction power. Consistent brush maintenance is a simple way to keep your device running smoothly. Understanding deep-sky imaging techniques can help you appreciate detailed views of the universe beyond cleaning routines. Additionally, paying attention to filter maintenance can further improve your vacuum’s overall efficiency and longevity. Incorporating professional servicing periodically can also help identify potential issues early and ensure your vacuum continues to perform optimally.
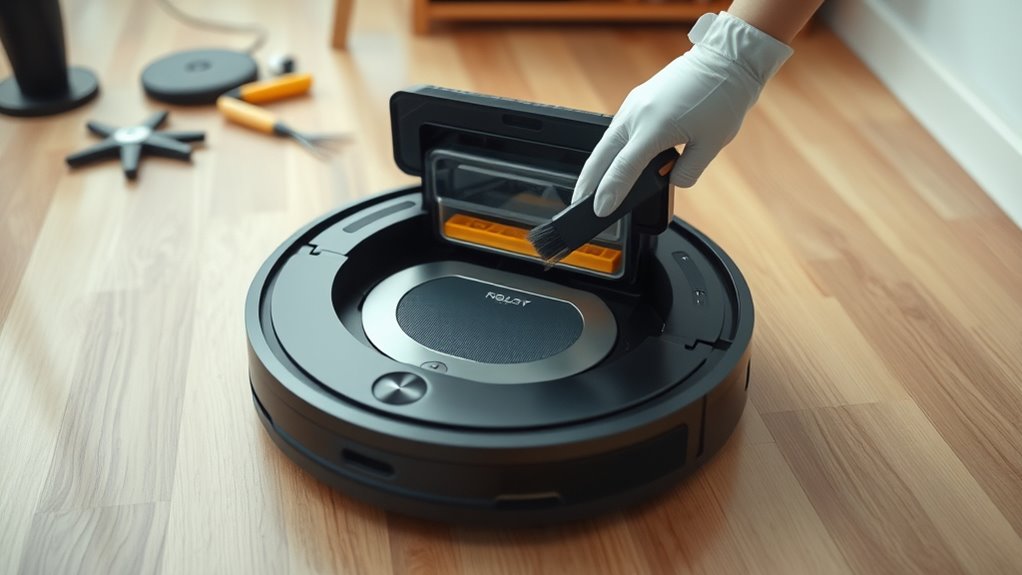
Checking and Replacing Filters

Checking and replacing filters is a crucial step in maintaining your robotic vacuum’s performance. Regular filter replacement ensures your device continues to operate efficiently and helps improve air quality in your home. Over time, filters collect dust, allergens, and debris, which can clog airflow and reduce suction power. To check the filters, remove the dustbin or filter compartment according to your vacuum’s instructions. Inspect the filter for dirt buildup or damage. If it looks dirty or has lost its shape, it’s time to replace it. Many filters are washable, but if yours isn’t, discard the old filter and insert a new one. Choosing filters with HEPA technology can enhance allergen control and overall cleaning efficiency. Additionally, using high-quality filters can extend the lifespan of your robotic vacuum and ensure optimal performance. Regularly replacing filters helps maintain air quality and prevents buildup of allergens and debris that could impair your vacuum’s operation. Keeping fresh filters in place maintains ideal airflow and ensures your robotic vacuum effectively cleans your floors and improves air quality. Incorporating filter maintenance into your routine can also help prevent clogs in the vacuum’s motor and prolong its life.
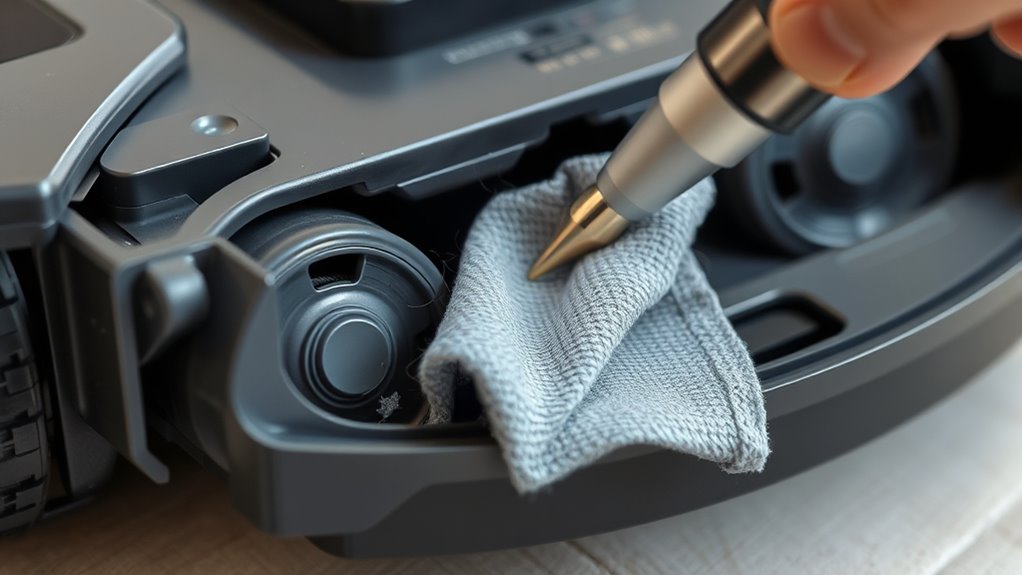
Inspecting and Cleaning Sensors and Cameras

Your robotic vacuum’s sensors and cameras play a vital role in steering your home, so keeping them clean is essential for peak performance. Dirt or smudges can interfere with sensor calibration and camera lens cleaning, reducing navigation accuracy. To guarantee optimal functioning, regularly inspect these components. Gently wipe sensors with a soft, dry cloth to remove dust. Use a microfiber cloth with a small amount of rubbing alcohol for camera lens cleaning, avoiding streaks. Check for debris or obstructions that might impair sensor signals. Be cautious not to scratch or damage sensitive parts. Proper cleaning guarantees your vacuum navigates efficiently and avoids obstacles. Additionally, understanding sensor calibration techniques can help you troubleshoot navigation issues effectively. Regular maintenance of these components leads to fewer missed spots and smoother operation, keeping your home spotless. Proper maintenance of sensors and cameras also helps prevent navigation errors that could otherwise cause the vacuum to miss areas or get stuck. Routine inspection and understanding sensor troubleshooting techniques can further enhance your vacuum’s performance, ensuring consistent operation. Regular attention to these details maximizes your vacuum’s lifespan and home maintenance, and being aware of common sensor issues can help you address problems promptly.
Examining and Maintaining the Wheels and Casters
Since the wheels and casters are responsible for your vacuum’s mobility, it’s important to examine them regularly for signs of wear or debris. Start by inspecting the wheels for any damage or buildup that could hinder movement. Clean off hair, dust, or debris lodged around the wheels and casters using a soft brush or cloth. Applying caster lubrication can improve rotation and prevent squeaking. Use the following table as a guide:
| Inspection Step | Maintenance Action |
|---|---|
| Check for debris buildup | Remove debris with a brush or cloth |
| Examine wheel condition | Replace if damaged or excessively worn |
| Lubricate casters | Apply appropriate lubricant |
| Test wheel rotation | Ensure smooth movement |
| Confirm proper alignment | Adjust if wheels are misaligned |
Regular wheel inspection and caster lubrication keep your vacuum functioning smoothly. Additionally, understanding the materials and fuels used in your vacuum can help you select the appropriate cleaning and maintenance techniques. Being aware of wear and tear can also prolong the lifespan of your device and ensure optimal performance. For example, inspecting the wheel material can help identify when a replacement is necessary due to deterioration over time. Performing routine maintenance regularly can prevent damage caused by debris, ensuring your vacuum remains effective and durable.
Updating the Firmware and App Settings
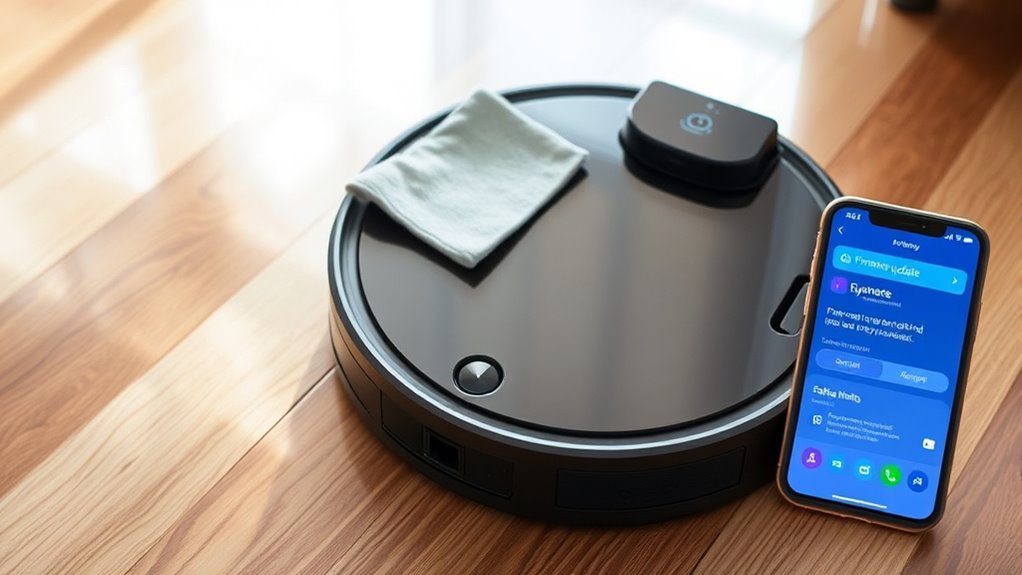
To keep your robotic vacuum running smoothly, you need to regularly check for firmware updates and keep the app current. Updating these guarantees you get the latest features and bug fixes. You can also fine-tune the settings for better cleaning efficiency and performance. Be aware that privacy policies may involve the use of cookies to enhance your experience and provide tailored content. Additionally, understanding the electrical safety aspects of your device can help prevent potential hazards and ensure reliable operation.
Check for Firmware Updates
Have you checked if your robotic vacuum has the latest firmware updates? Keeping firmware updated guarantees ideal device performance and compatibility with your app. Regular updates fix bugs, improve navigation, and add new features. To check for updates, connect your vacuum to Wi-Fi and open the app. Look for a firmware update notification or navigate to device settings. Remember, firmware updates depend on device compatibility, so verify your model supports the latest version. Staying current prevents issues like connectivity problems or missed cleaning areas. It’s a simple step that extends your vacuum’s lifespan and efficiency.
Some key points to consider:
- Regularly check for firmware updates via the app
- Verify your device is compatible with the latest firmware
- Keep Wi-Fi connection strong during updates
- Read update notes to understand new features
- Restart your device after updating for proper installation
Update App Regularly
Are you keeping your robotic vacuum’s app up to date? Regularly updating the app guarantees ideal app compatibility, which is essential for smooth operation and new feature access. Developers often release updates to improve the user interface, making it easier to navigate and control your vacuum. An outdated app can cause glitches or disconnects, hindering your cleaning routine. To stay current, check the app store regularly for updates and enable automatic updates if available. Keeping the app updated not only enhances performance but also ensures your device benefits from the latest security patches. This simple step helps your robotic vacuum operate efficiently and reliably, providing a better overall user experience. Stay proactive and maintain your app to keep your vacuum functioning at its best.
Adjust Settings for Efficiency
Did you know that updating your robotic vacuum’s firmware and app settings can considerably boost its cleaning efficiency? Keeping these up-to-date guarantees peak performance and helps customize your cleaning routine. For instance, you can enable smart scheduling to set cleaning times that fit your schedule, saving you effort. Adjust suction settings for different surfaces—higher for carpets, lower for hard floors—to improve cleaning without wasting power. Regular updates also fix bugs and improve navigation. To get the most out of your vacuum, consider these tips:
- Enable smart scheduling for automatic cleanings
- Adjust suction based on surface type
- Check for firmware updates regularly
- Customize cleaning zones in the app
- Fine-tune navigation and obstacle avoidance features
These adjustments help your robot work smarter, not harder.
Troubleshooting Common Issues
If your robotic vacuum isn’t working properly, start by checking for blocked sensors and clearing any debris. You should also verify the battery is holding a charge and replace it if necessary. Addressing these common issues can get your vacuum back to cleaning efficiently.
Clearing Blocked Sensors
Blocked sensors are a common cause of robotic vacuum malfunctions, but they’re usually easy to fix. When sensors are dirty or obstructed, your vacuum’s obstacle detection and sensor calibration can suffer, leading to missed spots or collisions. To clear these issues, inspect the sensors regularly and clean them gently with a soft, dry cloth. Avoid harsh cleaners that can damage sensitive components. Check for dust, hair, or debris blocking the sensors and remove them carefully. Confirm sensors are aligned properly after cleaning. Remember, clean sensors improve obstacle detection and overall performance. Regular maintenance prevents malfunctions and prolongs your vacuum’s lifespan. Keep an eye on sensor clarity to ensure your device navigates efficiently and maintains top cleaning power.
Fixing Battery Problems
When your robotic vacuum’s sensors are clean and functioning properly, it’s easier to identify and troubleshoot battery issues. One common problem is inaccurate battery readings, which can often be fixed through battery calibration. Follow your manufacturer’s instructions to fully charge and then fully discharge the battery to recalibrate it. Additionally, check the charging port for dust, debris, or corrosion. Cleaning the charging port with a soft cloth or compressed air guarantees proper contact between the vacuum and charger, preventing power issues. If your vacuum still won’t hold a charge, consider resetting the battery or replacing it if it’s old. Proper maintenance of the charging port and regular battery calibration can extend your vacuum’s battery life and improve overall performance.
Establishing a Regular Maintenance Schedule

Establishing a regular maintenance schedule for your robotic vacuum guarantees it continues to perform at its best and extends its lifespan. By scheduling routines and choosing cleaning times wisely, you ensure your device stays efficient. Regular checks prevent dust buildup, hair tangles, and battery issues. To set an effective routine, consider the following:
- Determine high-traffic cleaning times when messes are frequent
- Schedule cleanings during off-peak hours to avoid interruptions
- Set reminders for weekly filter and brush inspections
- Rotate cleaning areas to prevent wear and tear
- Adjust schedules based on seasonal changes and pet activity
Sticking to a consistent plan helps maintain ideal performance and reduces unexpected breakdowns. Properly timed maintenance ensures your robotic vacuum remains reliable and effective for years to come.
Frequently Asked Questions
How Do I Reset My Robotic Vacuum to Factory Settings?
To reset your robotic vacuum to factory settings, start by pressing and holding the reset button usually found on the device or within the app. If that doesn’t work, check the user manual for specific instructions. After resetting, consider doing a software update for peak performance. If your battery isn’t holding a charge, replace it before using the vacuum again. This process helps guarantee your device runs smoothly and efficiently.
Can I Use Cleaning Solutions on the Robot’s Components?
Imagine your robotic vacuum gliding smoothly across your floor, but using harsh cleaning solutions on its components can cause damage. You shouldn’t use cleaning solutions on the robot’s parts, as they can lead to component damage or malfunction. Instead, opt for a damp cloth or manufacturer-recommended cleaning tools. This way, you keep your device in top shape without risking harm from improper cleaning methods.
What Safety Precautions Should I Take During Maintenance?
You should always disconnect the robot from power before maintenance to guarantee safety. Handle the battery with care, avoiding punctures or exposure to heat to prevent hazards. Be cautious of sharp blades when cleaning or replacing parts, using gloves if needed. Keep the workspace dry and well-lit, and avoid using liquids near electrical components. Following these safety precautions helps prevent accidents and keeps your robotic vacuum working efficiently.
How Do I Troubleshoot Connectivity Issues With the App?
Sometimes, your smart device might be playing hard to get. To troubleshoot connectivity issues, start by ensuring your app is up-to-date, as updates often fix bugs. Check your Wi-Fi stability—restart your router if needed. Make sure your robotic vacuum is within range and reconnect it to your network. If problems persist, resetting the device and re-establishing the connection usually does the trick.
Is It Safe to Leave My Robotic Vacuum Charging Overnight?
It’s generally safe to leave your robotic vacuum charging overnight if you follow proper battery safety and charging tips. Most models have built-in safeguards to prevent overcharging, but it’s best to use the original charger and avoid exposing the vacuum to extreme temperatures. Always check your manufacturer’s instructions for specific guidelines. Proper charging helps maintain battery health and guarantees your vacuum’s longevity without risking safety.
Conclusion
Regularly cleaning and maintaining your robotic vacuum can extend its lifespan by up to 50%, saving you money and hassle. By following these simple steps, you guarantee it runs efficiently and effectively cleans your home. Remember, a well-maintained robot not only performs better but also reduces the likelihood of costly repairs. Stay consistent with your maintenance schedule, and you’ll enjoy spotless floors with minimal effort—making your cleaning routine smarter and easier.