To make a barista-style latte at home without expensive equipment, start by brewing a strong coffee with fresh, finely ground beans using a moka pot or AeroPress. Froth your milk with a jar, whisk, or handheld frother until it’s silky and microfoam-like, keeping it around 140°F. Pour the coffee and frothed milk in a steady stream, then add your favorite toppings or designs. Keep practicing, and you’ll master the art of cafe-quality lattes—continue to explore for expert tips.
Key Takeaways
- Brew strong, espresso-like coffee using a stovetop Moka pot or AeroPress with freshly ground beans.
- Froth milk with simple tools like jars, whisks, or handheld frothers for creamy microfoam.
- Use proper steaming techniques or gentle frothing to create silky, velvety microfoam with fine bubbles.
- Pour milk into coffee steadily, controlling flow to achieve latte art and visual appeal.
- Customize with toppings, flavors, and patterns to mimic café-quality latte presentations at home.
Gathering the Essential Tools and Ingredients
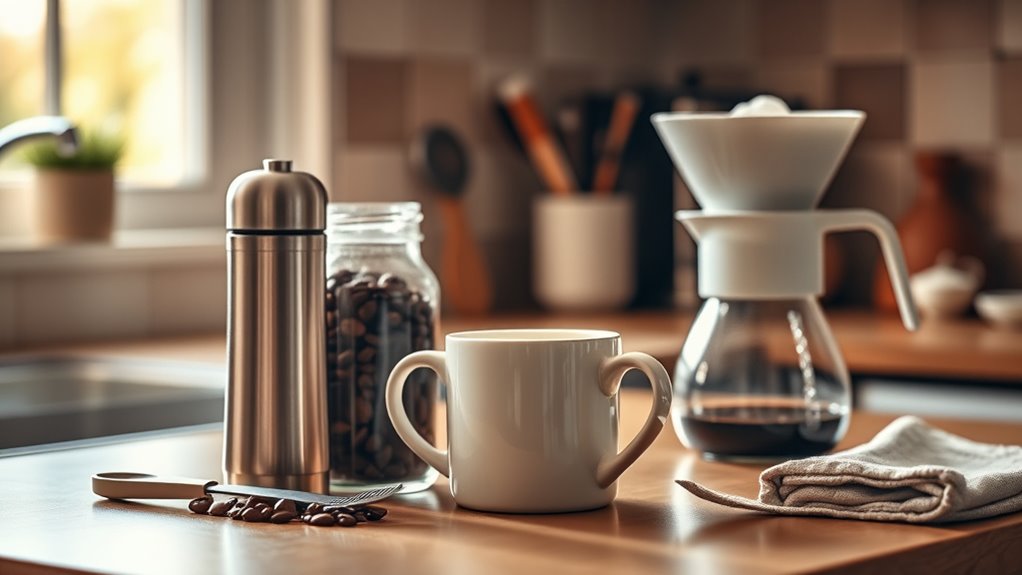
To make a barista-style latte at home, you’ll need to gather some essential tools and ingredients first. Start with quality coffee beans; fresh, whole beans are best for rich flavor. Choose your preferred milk alternative, such as almond, oat, or soy milk, to create a creamy, dairy-free latte. You’ll also need a grinder to freshly grind your coffee beans, ensuring ideal freshness. A heatproof pitcher or jar is useful for steaming and frothing the milk alternative. Additionally, a thermometer helps monitor milk temperature, and a spoon or whisk can aid in frothing. Proper temperature control is crucial for achieving that perfect, creamy froth and smooth texture. Using frosting techniques similar to professional baristas can greatly enhance your homemade latte. Practicing consistent techniques can improve your overall latte-making skills. Being mindful of milk frothing methods can help you create silky, well-textured foam. Incorporating creative presentation can elevate your homemade lattes to a professional level. Finally, have a mug or cup ready for serving. With these tools and ingredients in place, you’ll be well on your way to crafting a delicious, barista-style latte at home.
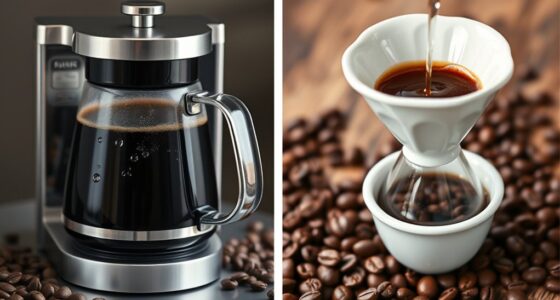
Brewing a Strong Coffee Base Without an Espresso Machine

Ever wondered how to achieve a strong, espresso-like coffee without an espresso machine? The key is selecting the right coffee beans—preferably dark roast for a richer flavor. Grind them finely, almost like powder, to maximize extraction. Use a stovetop Moka pot or AeroPress to brew a concentrated shot, mimicking espresso strength. These methods allow you to extract bold flavors without specialized equipment. Once brewed, pour your coffee into a cup and consider adding a small amount of hot water if it’s too intense. While you focus on brewing, don’t forget milk frothing—using simple tools like a jar or whisk can create the foam needed for a barista-style latte. This approach guarantees a robust coffee base perfect for your homemade latte. Natural pools and landscaping can also enhance your backyard coffee nook, creating an inviting outdoor space for your brewing ritual.
Frothing Milk Using Simple Kitchen Tools

Once you’ve brewed a strong coffee base, the next step is creating that creamy, frothy milk that gives a latte its signature texture. You don’t need expensive milk frothing equipment; simple kitchen tools work just fine. For alternative brewing methods, you can use a jar with a lid, a whisk, or even a handheld pump frother. To froth milk with a jar, pour warm milk in, seal tightly, and shake vigorously until frothy. With a whisk, whisk vigorously until foam forms. A handheld pump frother is quick and easy—just submerge and press the button. These methods generate enough foam for a barista-style latte without special equipment, making it easy to enjoy professional-quality drinks at home with everyday kitchen tools. Additionally, using steam-free frothing techniques ensures safety and convenience while achieving similar creamy results. Incorporating proper milk temperature helps create a stable, velvety foam that mimics café-quality lattes. Understanding milk frothing methods can also help you achieve the perfect texture and consistency for your homemade lattes. For optimal results, consider the airflow around the frothing device to improve foam stability and texture. Furthermore, selecting the right milk type can influence the richness and froth quality of your latte.
Achieving the Perfect Milk Texture and Temperature

To get that perfect milk texture, focus on your steaming technique—keep the tip just below the surface to introduce air gently. Aim for a milk temperature around 150°F to preserve sweetness and avoid scalding. When done right, you’ll achieve smooth microfoam that blends seamlessly into your espresso. Additionally, using clean equipment and maintaining proper hygiene can prevent the buildup of bacteria and mold, ensuring a healthier home environment. Proper cleaning routines help maintain equipment performance and extend the lifespan of your tools.
Steaming Technique Tips
Mastering the steaming technique is essential for achieving the ideal milk texture and temperature that make your latte stand out. To do milk steaming effectively, position the steam wand just below the milk’s surface to introduce air and create a smooth, velvety foam texture. Keep the wand at a slight angle and avoid submerging it completely to prevent large bubbles. As the milk heats, move the pitcher in a gentle circular motion to ensure even heating and consistent foam. Focus on creating a glossy, microfoam with a silky feel, not large bubbles or stiff foam. Maintain the right temperature by stopping once the milk reaches around 150°F. Proper technique results in milk that’s both creamy and perfectly textured for latte art and a balanced taste. Remember, transform your fitness journey by practicing these techniques regularly to develop confidence and precision in your milk steaming skills.
Ideal Milk Temperature
Achieving the perfect milk temperature is essential for creating a smooth, glossy microfoam that complements your espresso. The ideal milk temperature for steaming is between 150°F and 155°F (65°C to 68°C). When you reach this range, the milk will be hot enough to develop a rich texture without burning or scalding. Use a thermometer to monitor the milk’s temperature during steaming, ensuring precise control. Overheating can cause the milk to lose its sweetness and create a burnt flavor, while underheating results in a flat, unappealing texture. Consistently aiming for this temperature range helps you achieve ideal steaming, producing milk that’s velvety, well-textured, and perfectly suited for latte art. Remember, proper temperature control is key to barista-quality milk at home.
Achieving Smooth Microfoam
Once your milk reaches the ideal temperature range of 150°F to 155°F (65°C to 68°C), focus on creating a smooth, velvety microfoam. Use your milk steaming wand to introduce fine bubbles, which is essential for latte art and achieving that silky texture. Keep the wand tip just below the surface of the milk and angle it slightly to incorporate air gradually. As you steam, move the pitcher in small circles to ensure even heating and consistent microfoam. The goal is to produce a glossy, paint-like milk that flows smoothly when poured. Proper milk foaming techniques are crucial for perfect latte art and a professional-looking presentation. Mastering milk steaming helps you craft latte art and elevates your homemade latte, making it look professional and taste rich. Additionally, maintaining the correct milk temperature during steaming is vital to prevent scalding and preserve sweetness. Developing a training routine can help improve your technique and consistency over time. Paying attention to milk quality can also impact the final texture and flavor of your latte. With consistent practice, you will develop a better milk texture and gain confidence in your steaming skills. Patience and practice are key to perfecting your milk texture.
Combining Coffee and Frothed Milk for the Ideal Latte

To create a perfect latte, you need to master milk frothing techniques that produce a silky, velvety texture. Once your milk is ready, carefully pour it over the coffee, balancing the flow to achieve a smooth blend. With practice, you’ll also be able to craft latte art that adds a professional touch to your homemade drinks. Additionally, understanding the ideal milk texture can significantly enhance your latte-making skills. Using the right frosting techniques can help ensure your milk achieves the perfect consistency, similar to professional equipment. Regularly checking the integrity of adhesive products used in your kitchen or workspace can help prevent accidents when preparing your drinks. Knowing how to maintain optimal temperature control during milk steaming can further improve your results and prevent scalding. Developing a good quality assurance mindset can also help you refine your process and consistently produce high-quality lattes.
Perfect Milk Frothing Techniques
Mastering milk frothing is essential for creating a smooth, velvety latte. To achieve perfect foam consistency, focus on milk steaming techniques that heat the milk evenly without scorching it. Use a steaming wand or a frother to introduce air gradually, creating microfoam with fine, uniform bubbles. The foam should be silky and dense, not bubbly or frothy. Imagine this: simple, room-by-room solutions and the importance of a clear process to make your latte-making routine easier and more enjoyable.
| Milk Texture | Foam Quality |
|---|---|
| Smooth, glossy surface | Creamy, velvety microfoam |
| Slightly warm, not hot | Fine, consistent bubbles |
| Steamed to 140°F | Stable, holds shape |
Balancing Coffee and Milk
Achieving the perfect latte requires carefully balancing the coffee and frothed milk so that neither overpowers the other. Start by pouring your espresso or strongly brewed coffee into your cup, then add your preferred milk or milk alternative, like almond, oat, or soy milk. To create harmony, aim for a ratio of about one-third coffee to two-thirds milk. If you want to enhance flavor, consider adding subtle flavor infusions such as vanilla or cinnamon to the milk before frothing. This creates a more complex taste without overwhelming the coffee’s richness. Remember, the goal is to achieve a smooth integration so each sip offers a balanced blend of bold coffee and creamy milk. Adjust the proportions to match your taste preferences for a personalized latte experience.
Achieving Latte Art Looks
Ever wondered how baristas create those intricate latte art designs? It’s all about the way you combine your coffee and frothed milk. To achieve latte art looks, start with well-steamed milk, choosing the right milk types—whole milk creates the smoothest microfoam, but alternatives like oat or almond milk can work too. The key is pouring the milk steadily and at the right angle to form contrasting patterns. The texture of your microfoam influences the design’s clarity, so aim for a velvety, glossy finish. As you pour, focus on controlling your flow to build shapes like hearts or rosettas. Remember, the coffee flavor’s richness complements the visual appeal, making every cup both beautiful and delicious. Practice makes perfect, so keep experimenting!
Adding Finishing Touches and Personal Flairs

Adding finishing touches and personal flairs is your opportunity to make each latte uniquely yours. You can elevate your drink with decorative toppings like cocoa powder, cinnamon, or whipped cream, adding visual appeal and flavor. Experiment with flavor infusions by adding syrups or spice blends to customize your latte to your mood. These small details turn a simple coffee into a work of art and a personal treat.
| Decorative Toppings | Flavor Infusions | Creative Ideas |
|---|---|---|
| Cocoa powder | Vanilla syrup | Heart-shaped foam art |
| Cinnamon | Caramel drizzle | Drizzle patterns |
| Whipped cream | Spiced syrup | Edible flowers |
Tips for Consistent Results and Troubleshooting

To guarantee your latte turns out consistently delicious, it’s important to pay attention to key variables like milk temperature, espresso shot timing, and foam texture. Small adjustments make a big difference. Here are four tips to troubleshoot and achieve reliable results:
- Use fresh, high-quality coffee beans, and grind just before brewing for richer flavor.
- Experiment with milk alternatives to find one that foams well and complements your coffee.
- Monitor milk temperature—ideally around 150°F—to create smooth, velvety foam.
- Keep your equipment clean to prevent off-flavors and inconsistent extraction.
Creative Variations to Elevate Your Home Latte

Transforming a basic home latte into a café-worthy specialty is all about experimenting with flavors and presentation. To elevate your drink, try mastering latte art techniques like rosettas or hearts, which add a professional touch. For flavor infusion ideas, consider adding spices such as cinnamon or nutmeg, or blending in flavored syrups like vanilla or caramel before pouring. You can also infuse your milk with extracts like almond or coconut for a unique twist. Combining creative latte art with inventive flavors makes each cup special. Don’t be afraid to try layering different syrups or toppings like cocoa powder or whipped cream. These small adjustments will impress your taste buds and elevate your home brewing game, making every latte feel like a treat from your favorite café.
Frequently Asked Questions
Can I Use Plant-Based Milk for My Homemade Latte?
Yes, you can definitely use plant-based options for your homemade latte. Many plant-based milks, like almond, oat, or soy milk, froth well with the right milk frothing techniques. To get a creamy, barista-style foam, use cold milk, shake or whisk it vigorously, or heat it gently before frothing. Experiment with different types to find the one that gives you the best texture and flavor for your latte.
How Do I Prevent Milk From Scalding When Frothing?
Think of your milk as a delicate dance partner—keep it at a gentle, warm temperature, around 140°F, to prevent scalding. Use a slow, steady frothing technique, moving the wand just below the surface to introduce air gradually. Keep an eye on the milk’s temperature, and stop as soon as it gets warm to the touch. This way, you’ll achieve creamy froth without risking burnt, scalded milk.
What’s the Best Way to Store Leftover Coffee or Milk?
To store leftover coffee or milk, use airtight containers to keep them fresh longer. For milk, opt for a glass or plastic bottle with a secure lid, and always refrigerate promptly to prevent spoilage. Coffee can be stored in a sealed jar or bottle, ideally in the fridge. Follow refrigeration tips like keeping everything at consistent cold temperatures and avoiding frequent temperature changes to maintain flavor and safety.
Can I Make a Decaf Latte at Home?
Yes, you can easily make a decaf latte at home. Think of decaf coffee as a gentle whisper of caffeine, perfect for relaxing moments. Brew your decaf coffee or use decaf coffee grounds, then heat your preferred milk alternatives like almond, oat, or soy milk. Froth the milk, pour it over your decaf brew, and enjoy a soothing, barista-style latte without the jitters.
How Long Does Homemade Latte Stay Fresh and Tasty?
Your homemade latte stays fresh and tasty for about 2 to 4 hours if kept at room temperature, but for ideal flavor, enjoy it within the freshness window. To extend its freshness, store any leftovers in an airtight container in the fridge and reheat gently. Remember, the foam may lose its texture, and the latte might taste different over time, so it’s best to savor it soon after making.
Conclusion
With a little patience and the right techniques, you can craft a latte that rivals your favorite coffee shop’s masterpiece. Think of your homemade latte as a blank canvas — each step adding layers of flavor and flair. So, don’t be afraid to experiment and make it uniquely yours. Before long, your kitchen will transform into a cozy café, and your barista skills will shine brighter than the morning sun. Cheers to your perfect home-brewed latte!