
To temper chocolate at home, you’ll need a reliable thermometer, a double boiler or microwave, and a clean workspace. Melt the chocolate gently, stirring frequently, and control the temperature carefully—cooling to specific low points then reheating slightly—to encourage stable crystal formation. Test the temper with a quick smear on parchment to check for shine and firmness. Mastering precise tools and techniques makes your chocolate smooth and glossy—continue and you’ll discover how to perfect your process.
Key Takeaways
- Use a reliable thermometer to monitor chocolate temperature precisely during melting, cooling, and re-heating stages.
- Melt chocolate gently in a double boiler or microwave with short bursts, stirring frequently to prevent scorching.
- Cool chocolate on a marble slab or cool surface, then reheat carefully to the tempering temperature for glossy, firm results.
- Test tempering success by spreading a small amount on parchment; it should set quickly with a shiny, smooth surface.
- Maintain a clean, organized workspace and work slowly, adjusting temperatures gradually for consistent, professional-quality tempering.
Understanding the Science of Chocolate Tempering
Understanding the science of chocolate tempering is essential for achieving a glossy finish and a firm snap. At its core, tempering involves controlling cocoa butter crystallization, ensuring the right type of crystal forms. Chocolate polymorphism explains why different crystal structures behave differently—some create dull, soft chocolate, while others produce shiny, crisp results. When you temper chocolate correctly, you encourage the formation of stable Type V crystals, which give you that perfect sheen and satisfying texture. Temperature control is paramount; too hot or too cold disrupts the crystallization process. By understanding how cocoa butter crystallizes and how chocolate polymorphism affects texture, you gain the knowledge needed to produce beautifully tempered chocolate every time. This science is the foundation for professional-quality confections. Additionally, mastering chocolate crystallization allows you to troubleshoot common issues like blooming or uneven texture. Recognizing the crystal formation process helps in adjusting techniques to achieve consistent results and avoid common tempering pitfalls. A thorough understanding of tempering techniques enables more precise control over the final product’s appearance and texture. Moreover, understanding the cooling process helps in optimizing the tempering cycle for better results. Incorporating proper temperature management can significantly improve your success rate in home tempering endeavors.
Essential Tools for Tempering Chocolate
To temper chocolate successfully, you need the right tools, starting with a reliable thermometer to monitor temperature accurately. A double boiler setup helps gently melt and control heat without scorching the chocolate, while spatulas and scrapers keep everything smooth and manageable. Having these essentials on hand guarantees you can work precisely and achieve professional results. Additionally, understanding temperature control techniques can help optimize your tempering process for the best glossy finish and snap. Proper hygiene and cleanliness of your tools and workspace also play a vital role in preventing contamination and ensuring a smooth tempering process. Maintaining tools and workspace free from dust and residues is essential for achieving a perfect finish. Incorporating proper workspace setup can further improve your efficiency and success rate, especially when paired with connected tech that can monitor and guide your process for optimal results.
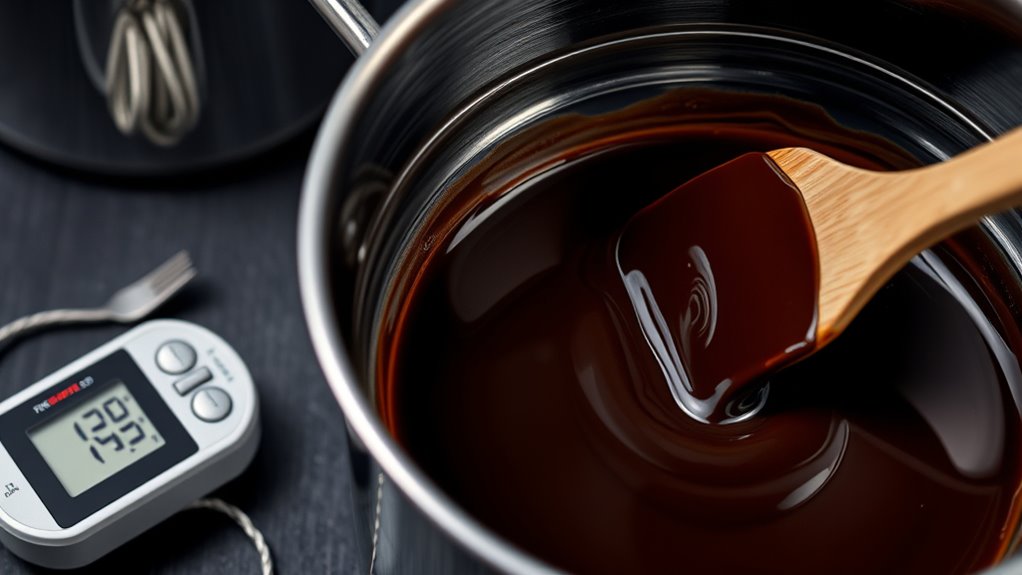
Thermometer Accuracy and Types
Accurate temperature measurement is essential for successful chocolate tempering, so choosing the right thermometer makes all the difference. You want a thermometer that provides precise readings, and many models offer digital calibration to guarantee accuracy over time. When selecting thermometer types, consider digital instant-read thermometers for quick, accurate measurements or infrared options for surface readings. Analog dial thermometers can work but often require more careful calibration. For the best results, pick a thermometer that’s easy to read and easy to calibrate, ensuring consistent temperatures during your tempering process. Remember, the more reliable your thermometer, the more confident you’ll be in achieving perfectly tempered chocolate. Proper tools make all the difference in creating glossy, crisp finishes every time.
Double Boiler Setup
Have you set up your double boiler correctly? Ensuring a proper double boiler setup is essential for safe, even heat transfer when tempering chocolate. Fill the bottom pot with a few inches of water, making sure it doesn’t touch the top bowl when placed inside. Bring the water to a gentle simmer—avoid boiling to prevent overheating the chocolate. Keep the heat source safety in mind by never leaving the setup unattended, and monitor the water temperature to prevent steam or water from splashing into the chocolate. Use a heatproof bowl that fits snugly over the pot without gaps. This setup provides consistent, controlled heat, indispensable for tempering chocolate successfully without burning or seizing. Proper double boiler setup makes the process safer and more precise.
Spatulas and Scrapers
Using the right spatulas and scrapers is essential for achieving a smooth, glossy chocolate finish during tempering. A flexible spatula allows you to incorporate spatula techniques like gentle folding and spreading without disrupting the temper. Scraper designs vary—flat, angled, or curved—help you remove excess chocolate, smooth surfaces, and ensure even temperature distribution. Proper tools improve control and reduce waste, making your tempering process more efficient. Choose tools with heat-resistant materials to prevent melting or warping. Selecting the appropriate thermal conductivity can also help you understand temperature ranges and handling techniques better. Additionally, selecting tools with good heat resistance ensures longevity and safety during the tempering process.
Choosing the Right Type of Chocolate for Tempering

Choosing the right type of chocolate is essential for successful tempering because not all chocolates behave the same way when heated and cooled. Look for couverture chocolate, which contains a higher cocoa content and is specifically designed for tempering and coating. The cocoa content influences how easily the chocolate melts and sets smoothly; higher cocoa percentages typically produce a glossier finish and better snap. Consider flavor profiles as well—dark chocolate offers a rich, intense taste, while milk chocolate provides a creamier, sweeter flavor. White chocolate, with its unique composition, requires careful handling. Selecting the appropriate chocolate based on cocoa content and desired flavor guarantees a smoother tempering process and professional-looking results. Always choose high-quality chocolate for best outcomes. Proper chocolate selection is crucial to achieving a successful tempering process and desired texture. Additionally, understanding the melting points of different chocolates can help prevent overheating and ensure a glossy, firm finish. Knowing the temperature ranges for each type of chocolate can further optimize the tempering process and prevent issues like blooming or uneven texture.
Preparing Your Workspace for Tempering
Before you start tempering, make sure your workspace is spotless and dry to prevent any moisture from spoiling the chocolate. Organize your tools and ingredients so everything is within easy reach, reducing the risk of mistakes. A tidy, prepared area helps ensure your tempering process goes smoothly and produces glossy, perfectly tempered chocolate. Additionally, maintaining a calm environment can help you focus and execute each step accurately. Ensuring good air quality in your workspace can also contribute to a more comfortable and controlled tempering experience. Incorporating modern kitchen technology such as precise temperature controls can further enhance your results. Creating an accessible and safe work area by minimizing clutter supports a more independent baking experience and reduces potential hazards. Paying attention to kitchen ergonomics can also help prevent fatigue and improve your overall efficiency during the process.
Clean and Dry Surface
A clean and dry surface is essential for successful tempering, as any residue or moisture can interfere with the chocolate’s ability to set smoothly. Make certain your workspace is spotless and free of dust, grease, or leftover debris. Use a clean workspace with a flat, stable surface to prevent any accidental spills or uneven cooling. Additionally, keep all utensils—spatulas, bowls, and utensils—completely dry to avoid introducing water that can cause the chocolate to seize. Ensuring your tools are sanitized and free of contaminants can help maintain the integrity of the tempering process and lead to optimal results. Being aware of food safety standards can further help you create safe and successful chocolate treats. Proper workspace hygiene also supports mental well-being by reducing stress associated with food preparation and ensuring a satisfying outcome.
Organize Tools and Ingredients
To guarantee smooth tempering, organize your tools and ingredients beforehand so everything is within easy reach. Gather your thermometer, spatula, and a heatproof bowl, ensuring they’re clean and dry. Prepare high-quality chocolate with a rich flavor by sourcing it from reputable suppliers, as ingredient sourcing impacts both taste and tempering success. Arrange your workspace in a clean, clutter-free area with good lighting, making it easier to monitor temperature changes. Having everything prepared minimizes distractions and helps maintain focus during the process. Keep your ingredients close by to prevent unnecessary movement that could cause temperature fluctuations. By organizing your tools and sourcing quality chocolate, you set a solid foundation for achieving glossy, perfectly tempered chocolate every time.
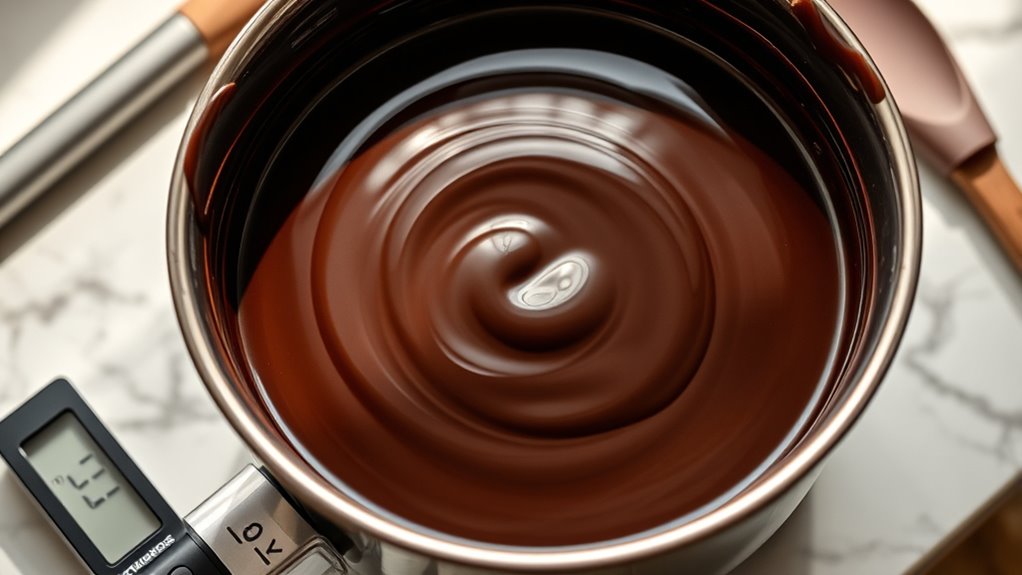
Melting Chocolate: Double Boiler and Microwave Methods
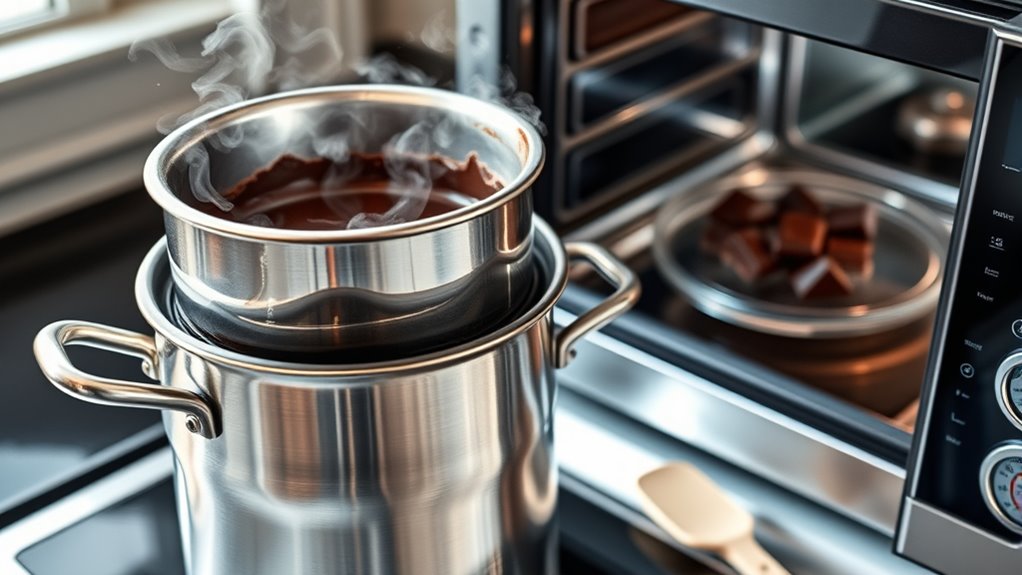
Melting chocolate can be easily achieved using either a double boiler or a microwave, both of which are effective methods when done correctly. To preserve the chocolate’s rich flavor and maintain the proper melting point, gentle heat is key. When using a double boiler, the chocolate sits in a heatproof bowl above simmering water, preventing direct heat contact. For microwave melting, heat in short bursts, stirring frequently to avoid overheating.
Picture this:
- Warm water gently heats the bowl, melting chocolate evenly
- Short microwave intervals prevent burning or seizing
- Stirring ensures smooth, glossy results
Both methods help you control temperature, ensuring the chocolate retains its flavor and melts smoothly without scorching or developing a grainy texture.
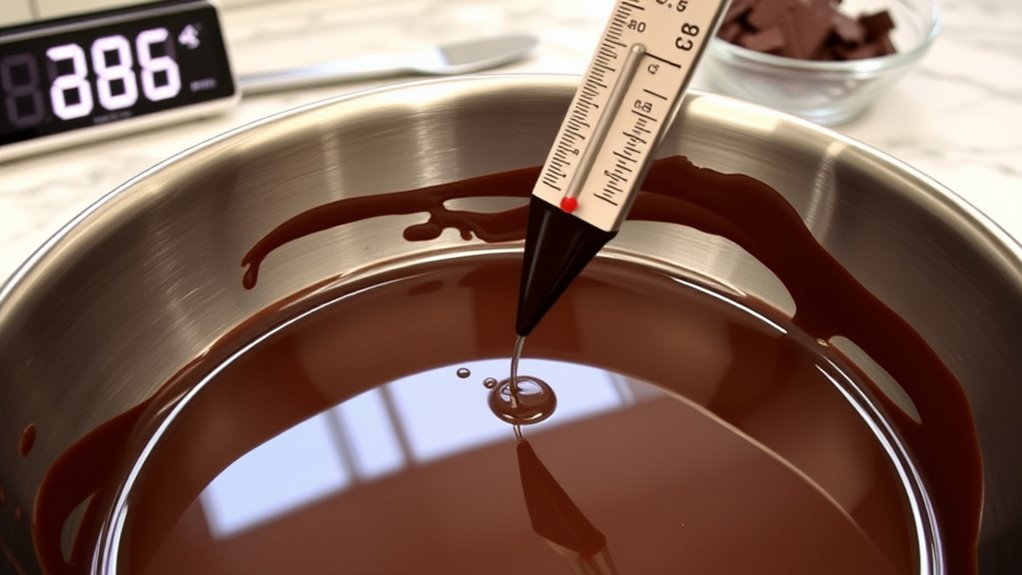
Monitoring and Achieving the Correct Temperatures
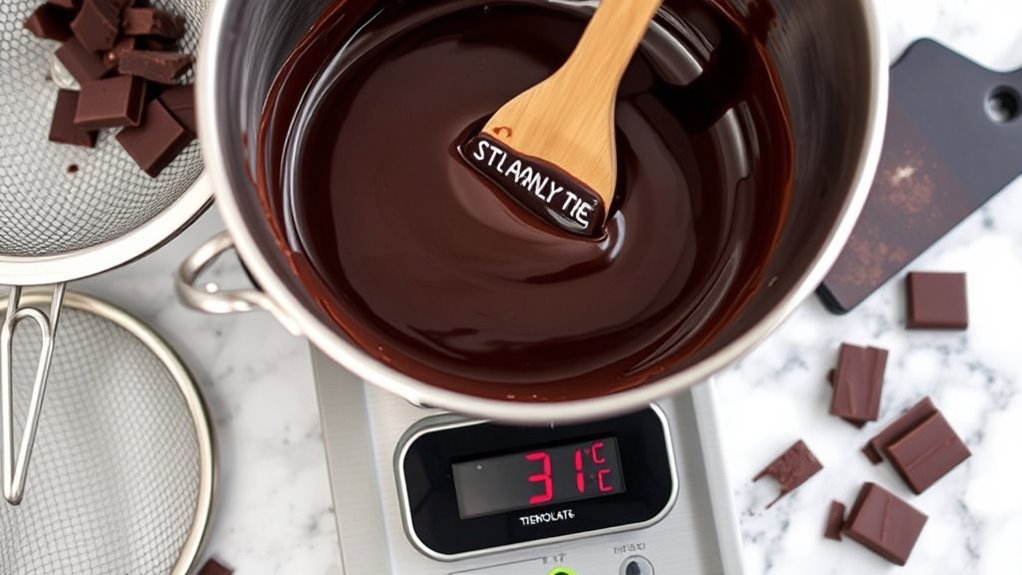
To guarantee your chocolate is perfectly tempered, you need accurate temperature monitoring tools like a digital or infrared thermometer. Knowing the ideal temperature targets for each stage helps you achieve that glossy, smooth finish. Keep a close eye on your readings to make sure your chocolate reaches and maintains the right temperatures.
Temperature Monitoring Tools
How can you guarantee you’re hitting the right temperatures when tempering chocolate? The key is using reliable temperature monitoring tools. Digital thermometers are essential; they give quick, accurate readings and are easy to use. Infrared sensors allow you to measure surface temperature without contact, making it simple to check the chocolate’s consistency during melting and cooling. To get precise results, consider these tools:
- Digital thermometers with probe tips for direct measurement
- Infrared sensors for non-contact surface readings
- Calibration tools to ensure your devices stay accurate
Using these tools helps you maintain control over the temperature, ensuring your chocolate is perfectly tempered every time. Proper monitoring minimizes guesswork and ensures smooth, glossy, professional-quality results.
Ideal Temperature Targets
Achieving the right temperatures is essential for successful tempering, as it guarantees the chocolate develops a glossy finish and a firm snap. For dark chocolate, aim to heat it to about 115°F (46°C), then cool it to around 82°F (28°C), and gently reheat to 88-90°F (31-32°C). Milk and white chocolates require slightly lower targets: heat to 110°F (43°C), cool to 80°F (27°C), then warm to 86-88°F (30-31°C). Maintaining these precise temperatures ensures your chocolate retains its sweet flavor and prevents bloom. Proper chocolate storage helps preserve its temper and flavor over time, making temperature control even more important. Monitoring these ideal targets guarantees a smooth, shiny finish and excellent texture for your homemade treats.
Cooling and Re-Heating Techniques
Cooling and re-heating are essential steps in the tempering process that help set the chocolate’s structure. Proper cooling techniques involve spreading the melted chocolate on a cool surface or stirring it gently to bring down the temperature without overcooling. Re heating methods typically include warming the chocolate slightly to reach the ideal tempering temperature. This process ensures the chocolate develops a glossy finish and a firm snap.
Cooling and re-heating are key to perfect, glossy, firm-tempered chocolate.
To visualize, think of:
- Using a marble slab or cool countertop for controlled cooling
- Stirring continuously to prevent uneven temperature drops
- Briefly reheating in a double boiler or microwave to the precise temperature needed
Mastering these cooling techniques and re heating methods guarantees smooth, glossy chocolate with a desirable texture.
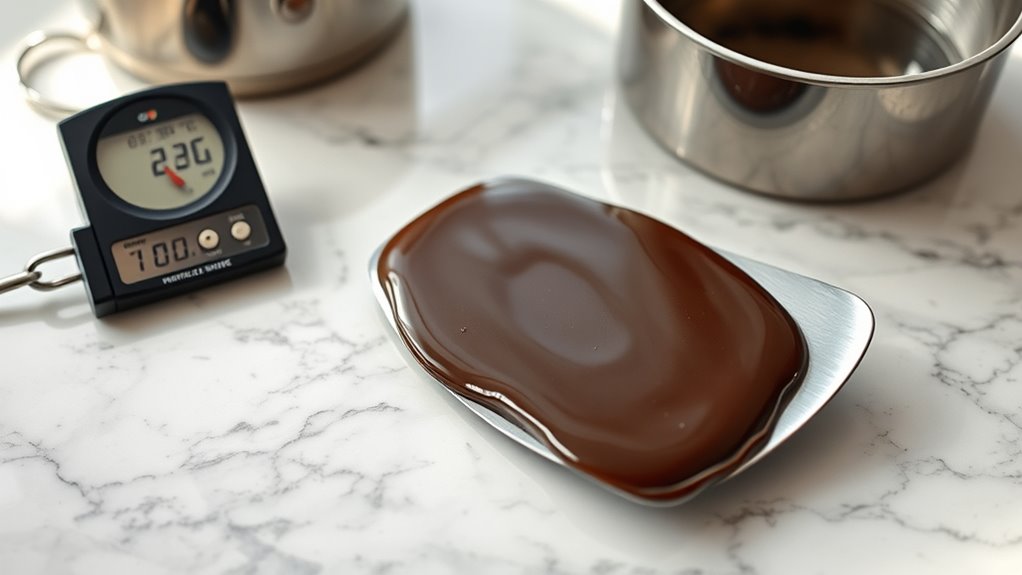
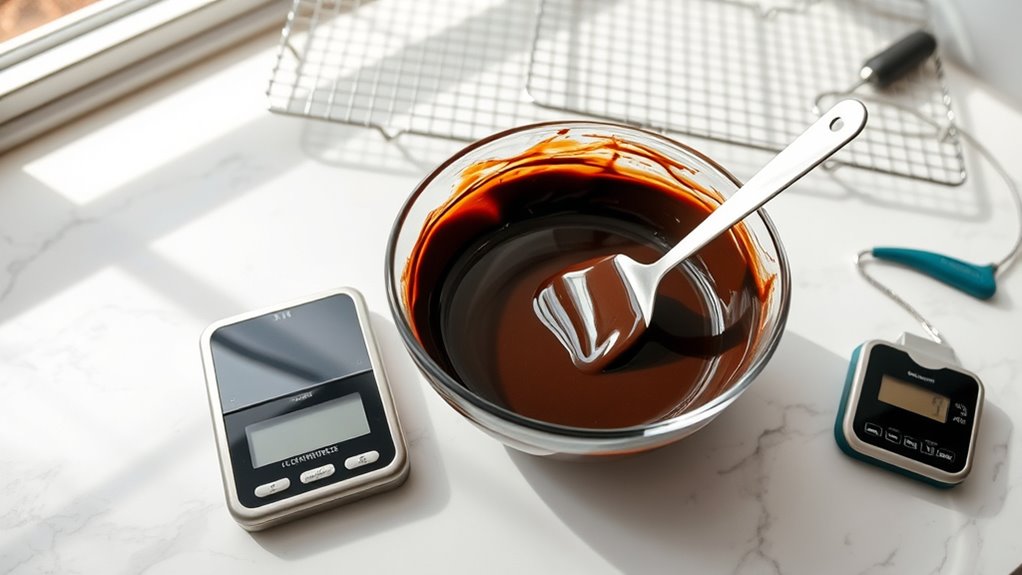
Testing for Proper Tempering

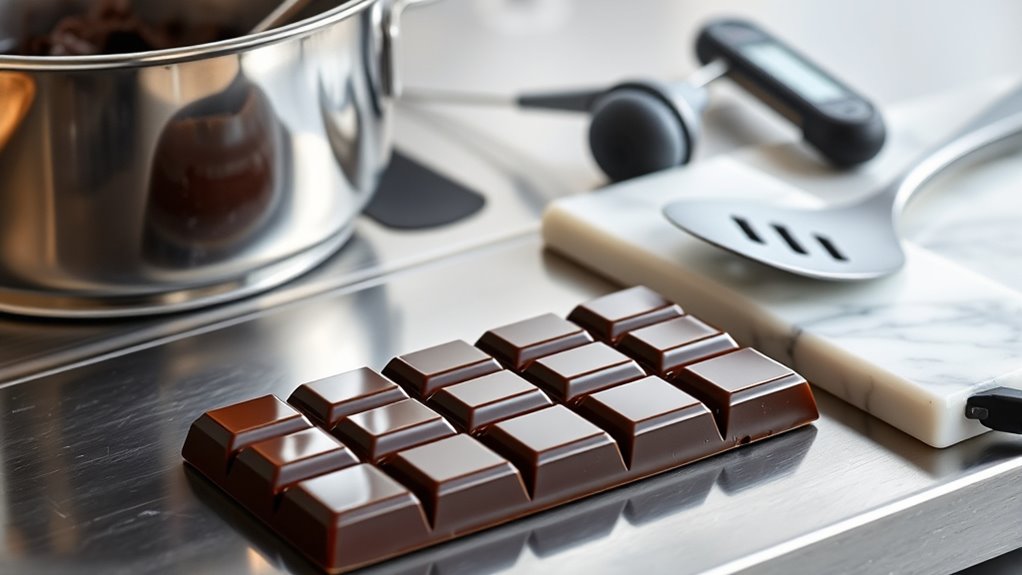
To guarantee your chocolate is properly tempered, you need to perform a simple test that confirms it has the right crystal structure. Gently spread a small amount of chocolate onto a piece of parchment paper or a smooth surface. Let it cool for a minute, then run your finger across the surface. If the chocolate is properly tempered, it will set quickly and feel firm and smooth without streaks. Properly tempered chocolate resists chocolate bloom, which appears as dull, grayish streaks, and ensures ideal flavor development. If it’s not properly tempered, the chocolate may be soft or streaky, indicating incomplete crystallization. This test confirms your tempering process is successful, leading to shiny, crisp chocolates with a longer shelf life and fewer issues.
Tips for Smooth and Shiny Chocolate Finishes

Once you’ve confirmed your chocolate is properly tempered, focusing on finishing touches can make a big difference. To achieve a smooth and shiny finish, avoid sugar crystallization, which can cause a dull, grainy surface. Keep your environment cool and dry to prevent chocolate bloom, a common issue that dulls the finish and leaves a whitish coating.
Here are some tips:
- Work quickly and avoid moisture, which can trigger sugar crystallization.
- Use a clean, dry spatula to gently smooth the surface.
- Allow the chocolate to set at room temperature to prevent bloom.
Troubleshooting Common Tempering Issues
Even experienced chocolatiers encounter issues during tempering, but most problems can be rectified with quick adjustments. Common tempering mistakes, like overheating or not cooling the chocolate enough, often lead to issues like streaks or dull finishes. If your chocolate develops a dull appearance or grayish bloom, it’s likely troubleshooting chocolate bloom. To fix this, gently reheat the chocolate to the proper tempering temperature, then cool it again carefully. If the chocolate is streaky or uneven, it may need to be reheated slightly and stirred thoroughly to ensure uniform temperature. Always use a reliable thermometer to monitor your temperatures precisely. Remember, patience and careful adjustments are key—most tempering issues can be resolved with small tweaks, restoring that glossy, smooth finish.
Frequently Asked Questions
Can I Temper Chocolate Without Specialized Tools or Equipment?
Yes, you can temper chocolate without specialized tools using DIY techniques and alternative tools. You can melt chocolate gently in a microwave or over a double boiler, then cool it on a cool surface like a marble slab or stainless steel countertop, stirring constantly. This method helps achieve the right temper. Although it might take some practice, it’s doable with common kitchen items and patience.
How Long Does the Tempering Process Typically Take?
The tempering process usually takes about 15 to 30 minutes, depending on your chocolate and cooling methods. You’ll notice the chocolate reaches a smooth, glossy consistency and a firm texture when properly tempered. To speed it up, you can cool the chocolate quickly with a cool surface or gentle stirring. Keep an eye on the temperature and stir regularly to achieve the perfect chocolate consistency.
What Are Common Signs of Improperly Tempered Chocolate?
If your chocolate has a dull, streaky appearance or develops a white coating called bloom, it’s a sign of improper tempering. You might notice a grainy or untempered texture that feels soft or crumbly, rather than smooth and glossy. These signs indicate that the chocolate hasn’t been cooled or heated correctly, leading to poor crystallization. Properly tempered chocolate should be shiny, firm, and melt smoothly in your mouth.
Can I Reuse Tempered Chocolate for Future Projects?
Reusing tempered chocolate is like saving a precious keepsake, but it’s tricky. You can reuse leftovers if you store them properly in an airtight container, keeping them at a consistent temperature. However, note that reheating and remelting may affect its temper, causing a dull finish or bloom. For best results, use leftover chocolate within a few days and always check its appearance before reusing it in future projects.
How Do Humidity and Temperature Affect the Tempering Process?
Humidity effects can cause your tempered chocolate to seize or develop a dull appearance, making it difficult to work with. High humidity introduces moisture, disrupting the tempering process, so you should keep your workspace dry. Temperature control is vital; maintaining a consistent, cool environment helps the chocolate set properly and prevents blooming. Use a thermometer and avoid temperature fluctuations to guarantee shiny, smooth results every time.
Conclusion
Mastering chocolate tempering at home is easier than you think, and it’s a skill worth learning. Did you know that properly tempered chocolate has a 30% longer shelf life and a shinier finish? With the right tools, techniques, and a bit of practice, you’ll create smooth, glossy chocolates every time. Keep experimenting, and soon you’ll impress everyone with your beautifully tempered treats—delicious, glossy, and perfectly set!